 bluename
 How to Care for Pinguicula: Soil Drainage Tips for Thriving Butterworts
If you’ve ever found yourself staring at a sad, wilting Pinguicula (butterwort) and wondering, “What am I doing wrong?”, you’re not alone. For years, I struggled with these fascinating carnivorous plants. They’d arrive vibrant, only to slowly decline, with leaves turning soft or roots rotting despite my careful watering. The breakthrough, the single most critical factor I discovered, wasn’t about water itself, but about what happens to it after you pour it. The secret lies almost entirely in soil drainage. Mastering this one aspect transformed my butterworts from surviving to spectacularly thriving. In this guide, I’ll share my hard-won, practical tips for Pinguicula soil drainage that will give your plants the foundation they desperately need.
Understanding Why Drainage Isn't Optional for Pinguicula
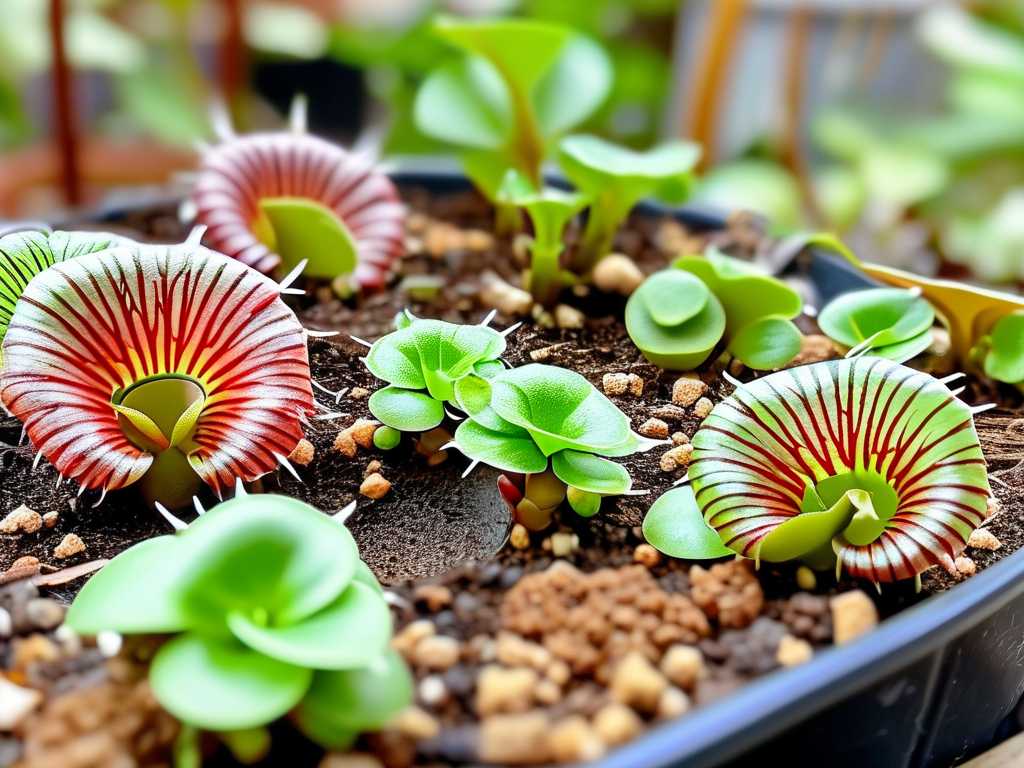
Pinguicula are not your average houseplants. In the wild, many species grow on sheer limestone cliffs, in rocky alpine seeps, or on mossy banks where water flows through quickly, leaving their roots moist but never waterlogged. Their root systems are fine and delicate, adapted to breathable, mineral-heavy substrates. When we place them in standard, moisture-retentive potting soil, we are essentially suffocating them. Poor drainage creates an anaerobic (oxygen-poor) environment, a breeding ground for harmful bacteria and fungi that cause root rot—a death sentence for butterworts.
As the International Carnivorous Plant Society (ICPS) emphasizes, a well-draining, airy medium is the cornerstone of successful carnivorous plant cultivation. It’s not a suggestion; it’s a requirement. My journey to understanding this involved losing a beautiful Pinguicula moranensis to root rot. I was using a “carnivorous plant soil” from a big-box store that, in hindsight, was far too peaty and dense. The plant sat in persistent dampness, and its core turned to mush within a month. That loss was my turning point.
My 2-Week Soil Drainage Experiment: From Theory to Practice
I decided to get scientific. I had three new, healthy Pinguicula ‘Sethos’ plants. For two weeks, I monitored them in three different setups to see the direct impact of drainage.
- Plant A (The Control/My Old Method): A 50/50 mix of peat moss and perlite in a standard plastic pot with small bottom holes.
- Plant B (The Improved Mix): A 1:1:1 mix of silica sand, perlite, and peat moss in a plastic pot with multiple enlarged drainage holes.
- Plant C (The “Expert” Setup): A predominantly mineral mix of crushed limestone chicken grit, perlite, and a tiny amount of peat (roughly 2:1:1) in a tall, unglazed terracotta pot.
I watered them all using the tray method, filling the saucer with about 0.5 inches of distilled water and letting the medium wick it up. Here’s what I observed over 14 days:
- Week 1: Plant A’s surface was still visibly damp after 4 days. Plant B’s surface felt cool but not wet after 2 days. Plant C’s surface was dry to the touch within 24 hours, though the lower portion in the terracotta pot remained slightly moist.
- Week 2: Plant A began showing signs of stress—the outer leaves became slightly limp. Plant B looked consistently healthy, with firm, sticky leaves. Plant C not only looked healthy but showed a noticeable increase in dew production on its leaves, indicating it was very happy.
The result was clear: faster water movement and evaporation (Plants B & C) correlated directly with healthier plant response. The soggy medium (Plant A) was already causing issues. I immediately repotted Plant A into the “Improved Mix,” and it recovered within a week. This experiment cemented my belief: optimizing drainage is non-negotiable.
Building the Perfect Well-Draining Pinguicula Soil Mix
There is no one “perfect” mix, as different species have slight preferences, but the principle is constant: fast drainage with some moisture retention. Based on my experience and consultations with resources like the Carnivorous Plant Newsletter, here are the components and my recommended Pinguicula potting mix recipes.
Core Components:
- Inert Mineral Grit (The Drainage Champion): This is the star. I use horticultural pumice or crushed limestone chicken grit (size #2 or #3). They are insoluble, provide permanent aeration, and limestone can benefit Mexican and temperate species that prefer alkaline conditions. Avoid vermiculite, as it breaks down and holds too much water.
- Perlite (The Lightweight Aerator): While it can float and turn white with algae, it’s readily available and effective. Use a coarse grade. Rinse it before use to reduce dust.
- Silica Sand (The Stabilizer): Must be coarse, sharp, and washed. Play sand or beach sand will compact and kill your plants. It adds weight and improves drainage structure.
- Peat Moss or Sphagnum Moss (The Moisture Manager): Use sparingly. For most butterworts, peat should be a minor component, not the base. Long-fiber sphagnum moss is excellent for lining baskets or for species that prefer more constant moisture.
My Go-To Recipes:
- All-Purpose Mix (Great for Beginners): 1 part silica sand, 1 part perlite, 1 part peat moss. This was my “Improved Mix” and is a reliable, safe starting point.
- Mineral-Heavy Mix (For Mexican & Limestone-Loving Species): 2 parts crushed limestone chicken grit, 1 part perlite, 1 part peat moss. This is my favorite for P. moranensis, P. gypsicola, etc.
- Long-Fiber Sphagnum Method: For species like Pinguicula primuliflora, I use pure, live or dried long-fiber sphagnum moss fluffed up in a shallow pot. It drains well yet stays consistently moist.
The Pot Matters: Choosing the Right Container
The best soil mix can fail in the wrong pot. Here’s what I’ve learned:
- Material: Unglazed terracotta is a game-changer. It’s porous, allowing water to evaporate from the sides of the pot, significantly enhancing drainage and aeration. Plastic pots retain all moisture. If you use plastic, you must be extra cautious with watering and ensure the mix is very gritty.
- Drainage Holes: More is better. I often drill additional holes in the sides near the bottom of plastic pots. A single small hole is insufficient.
- Shape: Butterworts have shallow root systems. A deep pot holds more wet substrate below the roots, which is risky. Opt for shorter, squat pots or alpine pans. My terracotta pots are rarely more than 4 inches tall.
Watering in Harmony with Your Drainage
Perfect drainage changes your watering strategy. You can water more freely without fear of rot. I use the “top-watering until it runs through” method for my gritty mixes, about once or twice a week during growth season, allowing the top to dry slightly between waterings. The tray method works too, but I never let pots sit in water for more than a day if the mix is very dense. Always, always use low-mineral water: rainwater, distilled, or reverse osmosis. Tap water will deposit minerals that clog the soil structure and poison the plant.
Troubleshooting: The Pitfalls I’ve Encountered (And Fixed)
- The “Soggy Bottom”: Even with a good mix, the bottom of the pot can stay too wet. Solution: Create a base layer of coarse pumice or lava rock before adding your main mix. This creates a drainage reservoir.
- Algae and Moss Growth on the Surface: A green crust indicates constant surface moisture and too much light on the soil. Solution: Top-dress with a thin layer of coarse sand or chicken grit. It looks neat, keeps the surface drier, and discourages algae.
- Mix Compaction Over Time: Peat can degrade, and mixes settle. Solution: Repot every 1-2 years. When you do, gently tease out the old mix and inspect the roots—they should be white and firm.
- Leaves Losing Dew: This can be a humidity issue, but often it’s a root health issue linked to poor soil conditions. Solution: Check your soil and drainage first before blaming the air. A happy root system supports dewy leaves.
Frequently Asked Questions
Can I use succulent/cactus mix for my Pinguicula? I strongly advise against it. Most commercial succulent mixes contain fertilizers and often have components like coir or sand that may not be suitable. It’s safer and more effective to make your own tailored mix.
How do I know if my soil drainage is adequate? Perform the “pour-through test.” Water your pot until it drains freely from the bottom. Come back in 30 minutes. If the surface still looks shiny-wet or water pools in the saucer, your drainage is too slow. The surface should look moist but not saturated.
My butterwort is in a dense peat mix and seems okay. Should I still repot? If it’s actively growing and healthy, you can wait until the end of its current growth cycle. However, the risk of sudden rot is always present in a dense medium. For long-term health and to avoid the heartbreak I experienced, planning a repot into a grittier mix is the best proactive care you can give it.
Getting the soil drainage for butterworts right is the most impactful step you can take in their care. It’s the difference between constant worry and relaxed enjoyment. By investing time in creating the right porous, breathable environment, you’re working with the plant’s natural biology, not against it. Start with a simple gritty mix, choose a breathable pot, and observe how your Pinguicula responds. You’ll likely see a new level of vigor, stickiness, and growth that makes all the experimentation worthwhile. Happy growing





