 bluename
 How to Remove Pest Webbing from Pinguicula Foliage: My 14-Day Method
You can remove pest webbing from Pinguicula foliage in about fifteen minutes with warm distilled water, a soft artist's brush, and fine tweezers. But if you stop there, the webbing is back within a week. I learned that the hard way. The web is just the visible symptom. The real job is killing whatever is spinning it and then changing the conditions that invited it in.
Below is the exact 14-day routine I use now. Real steps, real timing, plus the mistakes that cost me two butterworts before I figured this out.
Quick reality check first: if you only take one thing from this article, take this. 90% of indoor plants die from overwatering, and Pinguicula is not the exception people think it is.

What That Webbing Actually Is
Nine times out of ten, webbing on a butterwort means spider mites. They love dry indoor air, warm rooms, and still corners.
The mites themselves are tiny. Think grains of salt that move. You usually spot the web before you spot the bugs.
Other possibilities exist though. Mealybugs leave cottony clumps. Some molds look stringy. And sometimes it's literally just a house spider, which is harmless and honestly helpful.
So the first move is figuring out which one you're dealing with. Don't skip it.
Is It Pest Webbing or Just a Spider?
Here's my two-second test. I tap the leaf gently with a fingertip.
If the web snaps back into place or a spider runs out, it's a spider. Leave it alone. Spiders eat mites.
If the webbing is fine, dusty, and clustered in the leaf joints and along the crown, that's mites. It also tends to look messier, like lint stuck to the sticky leaf surface.
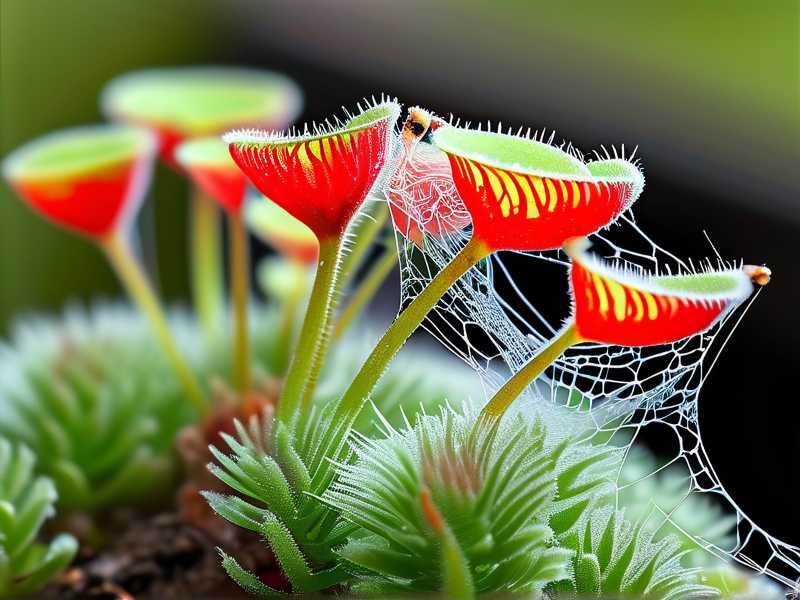
Another tell: butterwort leaves are naturally gluey. Mite webbing sticks to that mucilage and looks fuzzy, not clean and geometric.
I also hold a white sheet of paper under the leaf and tap it. Tiny specks that start crawling within a few seconds = mites. That paper test has never failed me.
Why Butterworts Get Hit Harder Than Other Houseplants
Pinguicula leaves are covered in glandular hairs that produce mucilage. That sticky surface is the whole point of the plant. It catches fungus gnats, fruit flies, and the occasional gnat-sized snack.
But that same stickiness traps mite webbing instead of letting it blow away. So a light infestation looks like a heavy one.
There's a second problem. Most people grow Mexican butterworts on a tray of water in bright light, which is correct. But indoor heating dries the air around the leaves even when the tray is full. Mites breed in that dry layer just above the soil.
The RHS notes that spider mites thrive in warm, dry, still conditions and multiply fastest when humidity drops. That matches everything I've seen in my own grow space.
My 14-Day Plan for Cleaning Pinguicula Leaves
Here's the schedule I follow. It's not fancy. It works because it interrupts the mite life cycle instead of just wiping away evidence.
Day 1: Isolate First, Panic Later
Move the plant away from everything else. Mites walk between pots. They don't need to fly.
I put mine on a separate tray in a different room, on a sheet of white paper so I could see anything falling off.
Then I inspected every other plant within two feet. Mites had already reached a neighboring Pinguicula. That's normal. Assume they spread.
Day 1, Part Two: The Actual Removal
This is the part people rush, and it's the part that matters.
My tools:
- Distilled or rainwater, room temperature
- A soft watercolor brush (size 4 or so)
- Fine tweezers
- A spray bottle set to a fine mist
My steps:
- Hold the pot at an angle over the sink so water runs off the leaves instead of pooling in the crown.
- Mist the webbing lightly. Wet web is much easier to lift.
- Use the tweezers to grab the thickest strands near the leaf joints and pull them away slowly.
- Brush the remaining fuzz toward the leaf edges, then rinse.
- Repeat until the leaf surface looks clean and glossy.
Word of warning. Don't scrub. The mucilage glands are delicate. If you scrub hard enough to feel friction, you're damaging the leaf.
Whole process takes about 12 to 15 minutes per plant. I did two plants in half an hour.
Days 2 to 4: Rinse and Wait
Days 2, 3, and 4 I did a quick plain-water rinse each morning. No soap, no oil, no sprays.
Why no oil? Because I tried neem oil once. It stripped the mucilage off the leaves and they went brown at the edges within 48 hours. That plant never fully recovered its sticky surface.
If you want a heavier treatment, insecticidal soap is the safer option and it should be diluted far more than the label says for carnivorous plants. But I genuinely don't use it unless the infestation is severe.
I also rechecked the paper test every day. On day 2, I still found three moving specks. Day 3, one. Day 4, none.
That doesn't mean it's over. Mite eggs hatch in about three days at room temperature. You have to keep going past the visible finish line.
Days 5 to 9: Fix the Air and the Water
This is the phase most people skip, and it's why the webbing returns.
Two changes matter:
Humidity. I moved the plant to a spot with 50 to 60 percent relative humidity. Not a closed terrarium. Just a pebble tray plus a small group of other plants nearby. Mites hate that.
Airflow. I added a small clip fan running on low, pointed slightly away from the plant. Stagnant air is mite heaven.
I also switched to bottom watering only during this window. Wet leaves plus still air is how you get rot on top of mites.
By day 7, I could see new leaves unfurling without any webbing between them. That was the first real signal I was winning.
Days 10 to 14: The Recheck
Day 10, full inspection. Paper test on all leaves, including the underside of the outer ones. Clean.
Day 12, another rinse. Just water.
Day 14, final check. Still clean, and the crown had pushed out two fresh sticky leaves.
At that point I stopped isolating, but I kept checking weekly for another month. Mites come back quietly. Assume you're never fully done.
Watering Pinguicula: Where Most People Go Wrong
Let me be blunt. Overwatering kills more butterworts than mites ever will.
My rules:
- Distilled water, rainwater, or reverse osmosis water. Never tap.
- Bottom water from a tray. Keep the tray shallow.
- Let the tray dry out for a day before refilling during active growth.
- During the winter rosette phase, cut way back.
I killed my third butterwort by keeping it permanently soggy in a deep saucer. The crown rotted from the inside out, and by the time I noticed, the whole rosette lifted off the soil.
Better to under-water slightly than to drown it. That's true of nearly every houseplant, honestly.
Light: Bright, Indirect, and Not a Dark Shelf
Butterworts want a lot of light. More than most people give them.
Mine sit near an east-facing window with a sheer curtain, or under a cheap LED grow bar about eight inches above the leaves for 12 hours a day.
Too little light = pale, stretched, floppy leaves. Weak leaves = weak plant = mite magnet.
Too much direct afternoon sun = scorched, crispy patches. I've done that too, on a south windowsill in July. The leaf tips went brown in a single afternoon.
Aim for bright and indirect. If your hand casts a soft shadow on the plant at noon, you're close.
Soil Mix and Repotting
My mix, which has worked for years:
- 2 parts peat moss or coco coir
- 1 part perlite
- 1 part vermiculite
- A small handful of sand or crushed pumice
It holds moisture but drains fast. That's the balance you want.
For pots, use plastic or glazed ceramic. Terracotta dries too fast for a plant that likes consistent moisture. And always pick a pot with real drainage holes. I've seen people use decorative cachepots with no holes. That's a slow execution.
Repot every 12 to 18 months, in early spring, right as new growth starts. I go up one pot size at most. Too big a pot means too much wet soil sitting around the roots.
Fertilizer: A Little Goes a Very Long Way
This is where carnivorous plant owners get nervous, and rightly so.
Butterworts can take a very diluted fertilizer, but only during active growth. I use a quarter-strength liquid fertilizer meant for orchids, applied to the soil once a month in spring and summer. That's it.
Never fertilize in winter. Never fertilize a stressed plant. Never fertilize right after repotting.
Honestly, most of my Pinguicula get by on catching fungus gnats and the occasional foliar feed. If your plant looks healthy, you don't have to feed it at all.
Pinguicula Care Through the Seasons
The AHS emphasizes matching care to the plant's natural growth cycle rather than forcing year-round growth. That advice is spot on for butterworts.
Spring
This is wake-up time. New leaves, new roots, new energy.
I repot now if it's needed. I start fertilizing lightly. I resume consistent tray watering.
I also clean up any dead leaves from the base. Old debris is where pests hide.
Summer
Watch the heat. Above 85°F, growth slows and mites speed up.
I keep the plant out of direct sun, keep airflow going, and never let the tray go bone dry. I also do a weekly leaf check, because summer is peak mite season indoors.
Fall
Growth slows. I taper fertilizer down to nothing by mid-fall, then start reducing water.
I also do a deep clean of the growing area. Wipe down shelves, rinse trays, toss old debris.
Winter
Mexican butterworts often go into a tight, non-carnivorous winter rosette. That's normal, not dying.
I keep mine cool, around 55 to 65°F, barely water, and stop feeding entirely. No fertilizer. No misting. No fussing.
If you keep watering like it's July, you'll rot the crown. I've watched a friend do exactly that over one winter.
Problems That Look Like Webbing But Aren't
Sometimes what you're seeing isn't mites at all.
- Cottony white clumps in leaf joints = mealybugs. Dab with a cotton swab dipped in rubbing alcohol.
- Fine stringy fuzz on the soil surface = mold from poor airflow. Scrape it off, increase air movement.
- Yellow lower leaves = usually overwatering, not pests.
- Brown crispy leaf edges = sunburn or mineral buildup from tap water.
- Sudden collapse of the whole rosette = crown rot. It's usually too late to save.
Diagnose first. Spraying everything with the same product wastes time and stresses the plant.
Three Beginner Mistakes That Make Pest Webbing Worse
1. Overwatering. Soggy roots mean a weak plant, and weak plants attract pests and can't fight them off. Let the tray dry between refills.
2. Wrong light. A butterwort on a dark shelf grows thin and pale. Move it somewhere bright. Fix the light before you fix the bugs.
3. Wrong pot. No drainage holes, or a pot three sizes too big. Both keep soil wet far too long. One size up, drainage holes, done.
I made all three in my first year. The plant didn't stand a chance.
FAQ
Can I just wipe the webbing off with a wet paper towel? You can, but you'll crush the leaf glands. Use a mist plus a soft brush instead. It takes longer but the leaf survives.
Do I need to throw the plant away if I see mites? No. Spider mites are beatable. Isolate, remove the webbing, rinse every few days, raise humidity, and keep checking for three weeks.
How often should I check for webbing after treatment? Weekly for the first month, then monthly. Mites return when conditions get dry and still again, so prevention is mostly about airflow and humidity.
Final Word
The webbing on your Pinguicula is annoying, but it's information. It tells you the air is too dry and the plant is under stress.
Clean the leaves gently. Rinse with distilled water for several days. Fix the humidity and airflow in the room. Then check the plant every week like it's a habit, not a chore.
Do that, and you'll spend a lot less time scraping webs off sticky leaves. I wish someone had told me that before I lost two plants learning it.




