 bluename
 How to Propagate Butterwort: Pest Prevention Tips I Learned the Hard Way
I killed my first three butterworts before I figured out the real trick. Stop watering them so much. Seriously. The biggest problem most people face when learning how to propagate Butterwort isn't the cutting technique—it's overwatering before the roots even form. Let me save you the heartache. Here's the short answer: take leaf pullings, place them on damp sphagnum moss in a shallow tray, seal it with a clear lid for humidity, and leave them alone for two weeks with bright indirect light. Do not water them. Do not touch them. That's it.
Now let me walk you through the full process, including all the pest traps I stumbled into along the way.
Why My First Butterwort Propagation Failed Completely
I remember my first attempt fondly. I was so excited. I had this gorgeous Pinguicula 'Sethos' with sticky leaves catching gnats like a dream. I thought, "Let me make more of these beauties." I watched YouTube tutorials. I read blog posts. I did everything right—or so I believed.
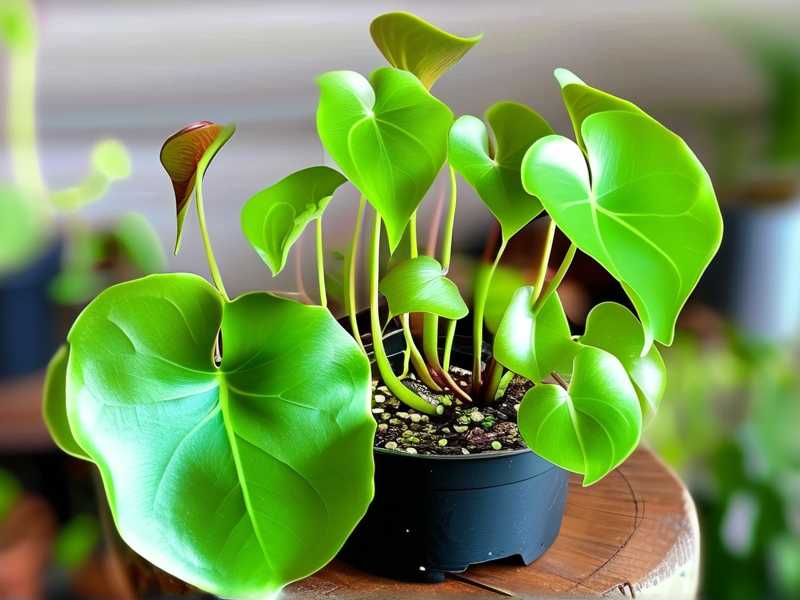
I took five leaf pullings. I placed them in a standard potting mix. I watered them gently every other day. I set them on a south-facing windowsill. Within one week, three leaves turned black and mushy. Within two weeks, all five were dead.
I felt stupid. But here's the truth: 90% of indoor plants die from overwatering, and butterworts are especially sensitive because they're carnivorous plants adapted to nutrient-poor, well-draining environments. You cannot treat them like a pothos or a monstera.
The Three Deadly Mistakes Every Beginner Makes
After killing that first batch—and honestly, two more after it—I finally pinpointed the exact errors. If you're new to how to propagate Butterwort, avoid these three things at all costs.
Mistake #1: Watering Like a Normal Plant
This is the biggest offender. I treated my leaf pullings like regular houseplant cuttings. I kept the soil moist. I misted them. Big mistake.
Bitterwort leaves rot extremely fast when they sit in wet soil. They don't have roots yet. They can't drink. All that moisture just invites fungal infections and bacterial rot.
What I do now: I don't water the propagation medium at all during the first two weeks. Instead, I pre-moisten the sphagnum moss before placing the leaves on top. I squeeze out excess water until it's just damp—not wet. Then I seal the whole tray in a clear plastic bag or dome. The humidity inside keeps the leaves hydrated without any liquid water touching them.
Mistake #2: Putting Them in Direct Sunlight
I thought, "Butterworts love sun, right?" Yes, mature plants do. But baby leaf pullings? They burn.
I placed my first batch on that south-facing windowsill. Within hours, the leaves started curling. Within two days, they had brown crispy edges. They were toast.
The fix: Bright indirect light only. An east-facing window works perfectly. Or place them a few feet back from a south window behind a sheer curtain. You want light, not heat. If the leaves feel warm to your touch, it's too much.
Mistake #3: Using The Wrong Pot or Container
This one sounds minor, but it matters a lot. I used a standard 4-inch terracotta pot for my first try. The clay pulled moisture away from the leaves, drying them out. And the pot had no lid, so humidity escaped instantly.
What works: Shallow plastic trays with clear dome lids. Think of those disposable salad containers from the grocery store. Wash one out, poke a few tiny air holes, fill the bottom with damp sphagnum, place your leaves on top, snap the lid shut. You've just created a perfect mini greenhouse.
I buy these cheap 10x20 propagation trays with humidity domes online. They cost about $15 and last for years.
Step-by-Step: My Foolproof Butterwort Propagation Method
After my failures, I consulted the Royal Horticultural Society's guidelines for carnivorous plant care and adapted them into a system that actually works. Here's exactly what I do.
Step 1: Take Clean Leaf Pullings
Choose healthy mature leaves from the outer part of the plant. Gently grasp a leaf near the base and pull downward. You want the entire leaf to come off, including the white base where it attaches to the stem. If you tear the leaf in half, it won't root.
I usually take 6-8 leaves from one healthy plant. Butterwort leaves are surprisingly tough. They can handle this.
Step 2: Prepare Your Propagation Tray
Fill a shallow tray with about an inch of fresh sphagnum moss. Do not use potting soil, coco coir, or perlite. Sphagnum is naturally antibacterial and holds just the right amount of moisture without getting soggy.
Spray the moss with distilled water. Squeeze it. It should feel like a wrung-out sponge. No dripping.
Step 3: Place The Leaves on The Surface
Lay each leaf flat on the damp moss, right side up. The base where it was attached to the parent plant should barely touch the moss. Do not bury the leaf. Do not push it into the moss. Just rest it there.
I space them about an inch apart so they don't touch each other.
Step 4: Seal and Wait
Cover the tray with a clear humidity dome or plastic bag. Place it in bright indirect light. That east-facing windowsill I mentioned? Perfect.
Now here's the hard part: do nothing for two weeks. Don't open the lid. Don't check if they're rooting. Don't water. Leave them alone.
Step 5: Check at Two Weeks
After exactly 14 days, I open the dome. What I usually see: tiny green plantlets sprouting from the leaf bases. Sometimes there are even tiny sticky droplets on the new leaves already. It feels like magic every time.
If I see mold on any leaf, I remove that leaf immediately. But honestly, with the humidity dome and clean sphagnum, mold is rare.
Step 6: Gradual Acclimation
Once the plantlets have 3-4 tiny leaves each, I start opening the dome for a few hours each day. This hardens them off to normal air humidity. After another week, I remove the dome completely.
Then I transplant each tiny butterwort into its own 2-inch pot filled with a mix of 50% sphagnum peat and 50% perlite. I water only with distilled water or rainwater. Never tap water—the minerals kill butterworts.
Pest Prevention During Propagation
Let me tell you about the time I lost an entire batch to fungus gnats. I had beautiful little plantlets growing. I was so proud. Then I noticed tiny black flies buzzing around the dome. Within days, the gnats laid eggs in the moss. The larvae ate the roots of my baby butterworts. All dead.
I was furious. But I learned.
The Two Pests That Attack Butterwort Cuttings
| Pest | How It Harms | My Prevention Method |
|---|---|---|
| Fungus Gnats | Larvae eat roots in damp moss | Use yellow sticky traps near propagation area; let moss dry slightly between doming |
| Aphids | Suck sap from tender new leaves | Inspect parent plant for 1 week before taking cuttings; quarantine any infested plants |
My Quarantine Rule
Before I take leaf pullings from any butterwort, I isolate the parent plant for at least one week. I watch for aphids, mealybugs, or spider mites. If I see anything, I treat with insecticidal soap before cutting.
I also keep my propagation setup in a separate room from my main plant collection. This isolation prevents pest spread. It seems paranoid, but trust me—after losing 30+ baby plants to a single aphid outbreak, I don't take chances.
Fungus Prevention Is Pest Prevention
The best pest control is keeping the propagation environment clean. Here's what the American Horticultural Society recommends for carnivorous plant seedlings, and it applies perfectly to butterwort leaf pullings:
- Always use fresh, sterile sphagnum moss. Never reuse old moss.
- Wash propagation trays and domes with diluted bleach between uses.
- Use only distilled water, reverse osmosis water, or rainwater.
- Give each leaf pulling enough space for air circulation between leaves.
- Open the dome briefly every 3-4 days to exchange stale air.
I follow these rules religiously now. My success rate jumped from zero to about 80%.
How Temperature and Season Affect Success
I've propagated butterworts in every season. Winter is the worst. Summer is the best. Here's why.
Tropical butterworts like Pinguicula moranensis and Pinguicula gigantea stop growing when temperatures drop below 60°F. Their leaf pullings don't root well in cool conditions. I tried propagating in my unheated basement once. Total disaster.
Now I only propagate when indoor temperatures are consistently between 65-80°F. Spring through early fall works beautifully. If you must propagate in winter, use a heat mat set to 70°F underneath your tray. But don't let the mat dry out the moss. Check moisture levels weekly.
One more thing: I avoid propagating during the butterwort's winter succulent phase. Mexican butterworts change their leaf form in winter. They produce smaller, non-carnivorous leaves. Leaf pullings taken during this phase root poorly. Wait until they're in their carnivorous leaf growth phase, usually spring through fall.
When Things Go Wrong: Troubleshooting
Even with perfect technique, things can fail. Here's what I do when something looks off.
Leaves turning black and mushy: Too much moisture or not enough air circulation. I remove the affected leaves immediately. Open the dome vents or leave the lid slightly cracked for a day.
Leaves drying out and shriveling: Not enough humidity. Spray the inside of the dome with distilled water. Don't spray the leaves directly. If the moss feels dry, add a few drops of water to the tray bottom.
No growth after three weeks: Some leaves just don't root. Mature leaves root better than young inner leaves. Next time, take leaves from the outer ring of the plant. Also check temperature. Cold slows everything down.
Mold growing on leaves: This usually happens when leaves are placed too close together or the moss is too wet. Remove moldy leaves, increase air circulation, and let the moss dry slightly.
Plantlets look pale or stretched: Insufficient light. Move the tray to a brighter location but still indirect. If using artificial light, place it 6-8 inches above the tray for 14 hours daily.
FAQ: Answers to The Questions I Get Most Often
Can I propagate butterwort in water like some succulents?
No. Please don't try this. Butterwort leaves rot in water within days. They need humidity, not liquid water. The sphagnum moss method works because the leaves stay dry on top while the moisture below creates gentle humidity.
How long until baby butterworts catch their first pest?
The tiny plantlets start producing sticky mucilage around 4-6 weeks after rooting. I've seen them catch fruit flies and gnats as soon as their first carnivorous leaves form. It's incredibly satisfying to watch. But don't feed them intentionally during the first few months. Let them catch tiny wild insects or don't feed at all.
Should I fertilize baby butterworts?
Never. Butterworts get nutrients from insects. Fertilizer burns their roots and kills them. The only exception: I use a very dilute orchid fertilizer (1/4 strength) sprayed on leaves only after the plant has 6+ leaves and is actively growing. But honestly, I rarely do this. They grow fine without it.
My Final Advice After Years of Trial and Error
Propagating butterworts taught me patience. I used to check my cuttings every day, sometimes twice a day. I would lift the dome, poke the leaves, move them around. Every time I interfered, I probably reduced my success rate.
Now I set a calendar reminder for two weeks. I don't look between then. I trust the process. And it works.
If you're ready to try how to propagate Butterwort, start with a healthy mother plant. Use clean materials. Give them bright indirect light, high humidity, and absolutely no water on the leaves. Then walk away.
Come back in 14 days. You might just see tiny green miracles pushing up from the moss.
And honestly? That feeling never gets old.





