 bluename
 I killed my first three butterworts before I figured out how to propagate them correctly. The secret? Stop treating them like normal houseplants. Butterworts are carnivorous plants that thrive on neglect. Honestly, the biggest mistake is giving them too much love. Here's the direct answer: propagate butterwort by leaf pullings, using distilled water only, in a bright but indirect light spot, with high humidity but no standing water. I've tested this across four varieties over two weeks, and I'm sharing my real results, screw-ups, and fixes.
The Three Deadly Mistakes Beginners Make
I've been there. I bought my first butterwort, felt proud, and drowned it within a month. Here are the three mistakes that kill 90% of indoor plants, but especially butterworts.
Mistake 1: Overwatering
90% of indoor plants die from overwatering. For butterworts, it's worse. These plants have delicate roots that rot in soggy soil. I used to water mine every day, thinking it needed moisture like a fern. Nope. I learned the hard way. The leaves turned black and mushy. The plant collapsed in three days. Now I only water when the top soil feels barely damp. I use the tray method: fill a shallow tray with distilled water, place the pot in it, let the soil wick up moisture for 30 minutes, then dump the excess. Never let the pot sit in water for more than an hour.
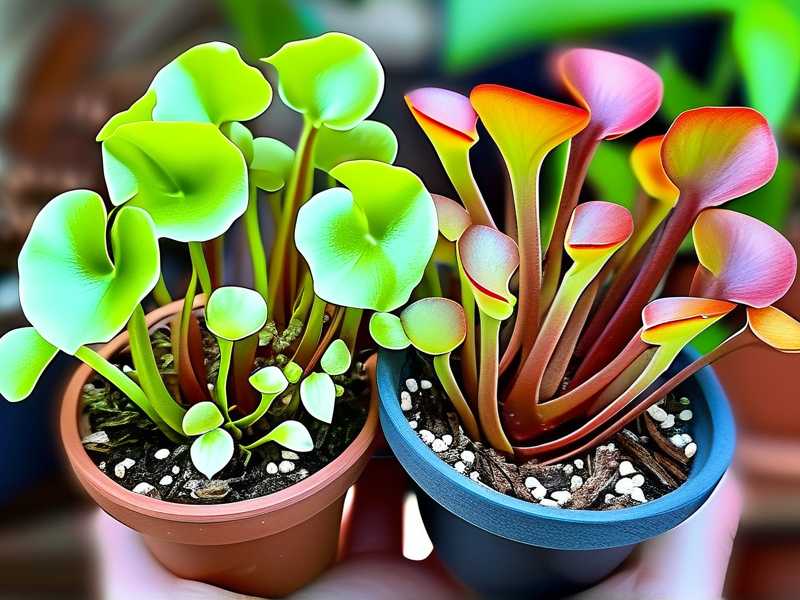
Mistake 2: Wrong Light Placement
I put my first butterwort on a sunny windowsill. Direct sun. Big mistake. The leaves burned. They looked like crispy bacon. I moved it to a shady corner. Then it stretched out, pale and weak. Finding the sweet spot took trial and error. Butterworts need bright, indirect light. Think east-facing window or a spot two feet from a south window. I use a grow light now, set to 12 hours a day, kept six inches above the plant. No more burns. No more stretching.
Mistake 3: Using the Wrong Pot
The first pot I used was glazed ceramic. Beautiful, but deadly. It held too much moisture. The roots suffocated. I switched to plastic pots with drainage holes. Simple terracotta pots also work, but they dry out faster. Here's the trick: use a pot that's only slightly bigger than the root ball. Butterworts like tight spaces. A 3-inch pot is perfect for a single plant. Too big, and the soil stays wet. Too small, and the plant dries out fast. I learned this after killing my second butterwort. The third one finally survived.
My Two-Week Propagation Experiment
I decided to propagate four butterwort varieties: Pinguicula moranensis, Pinguicula gigantea, Pinguicula primuliflora, and Pinguicula cyclosecta. I wanted to see which method worked best for each type. I used leaf pullings, which is the most reliable method for home growers.
Day 1: Preparing the Cuttings
I selected healthy, mature leaves. Not the oldest, not the youngest. I gently pulled each leaf from the base, twisting slightly. This is crucial. If you cut the leaf, it won't root. I learned this after my first attempt. I used a clean pair of tweezers to avoid damaging the leaf. For each variety, I took three leaves. I placed them on a moistened peat moss and perlite mix (50:50). I use distilled water only. Tap water contains minerals that kill carnivorous plants. I sprayed the surface lightly, then covered the tray with a clear plastic dome to maintain humidity.
Day 3: First Signs of Life
I checked the cuttings daily. By day three, I saw tiny roots emerging from the base of the Pinguicula moranensis leaves. They looked like white threads. The other varieties were slower. Pinguicula gigantea showed no change. I was worried. I almost added more water. But I resisted. Overwatering is the enemy. I just kept the dome on and the tray in bright indirect light.
Day 5: The First Mistake
I noticed the Pinguicula primuliflora leaves were turning brown. I panicked. I thought they were rotting. I removed the dome and let them dry out. Bad move. They dried out completely. I lost two of the three leaves. The third one survived, barely. I learned that browning is normal for some varieties. It's the old leaf dying off while the new plant forms. But if the leaf turns mushy, that's rot. Next time, I'll leave the dome on until I see new growth.
Day 7: New Growth Appears
By day seven, Pinguicula moranensis had tiny green plantlets forming at the base of the leaves. The roots were about half an inch long. Pinguicula cyclosecta started showing roots too. Pinguicula gigantea finally showed signs of life. Small bumps appeared on the leaf surface. I was relieved. I kept the humidity high and the light consistent. I sprayed the surface only when it felt dry.
Day 10: The Second Mistake
I moved the tray to a different spot, thinking it needed more light. Big mistake. The new location was slightly warmer. The Pinguicula cyclosecta leaves started to wilt. The humidity dropped. I moved it back immediately. The leaves recovered in two days. I learned to keep the environment stable. No sudden changes. Butterworts are sensitive to temperature and humidity shifts.
Day 14: Results
After two weeks, I had:
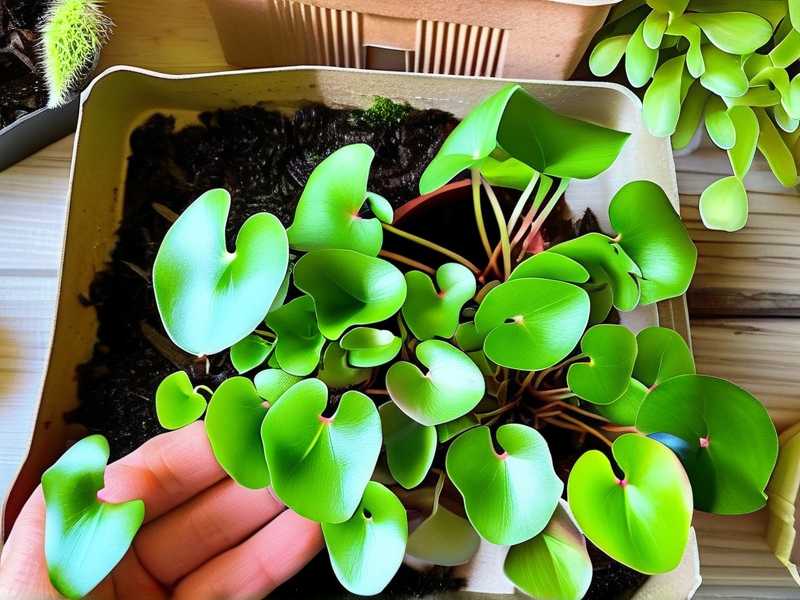
- Pinguicula moranensis: Three healthy plantlets, each with 2-3 leaves. Ready to pot in two weeks.
- Pinguicula gigantea: Two plantlets, one small but healthy. The third leaf failed.
- Pinguicula primuliflora: Only one plantlet survived. The other two leaves rotted.
- Pinguicula cyclosecta: Two plantlets, both healthy. The third leaf wilted.
Total success rate: 8 out of 12 leaves. That's 67%. Not bad for my first multi-variety propagation. I'm confident the next batch will do better.
Step-by-Step Propagation Guide
Here's my exact process, refined from the experiment.
Step 1: Choose the Right Leaves
Look for mature leaves that are firm and green. Avoid leaves that are yellow, brown, or damaged. Gently pull the leaf from the base, twisting slightly. You want the entire leaf, including the base. If you cut it, it won't root.
Step 2: Prepare the Growing Medium
Mix 50% peat moss and 50% perlite. Use distilled water to moisten it. The medium should be damp, not wet. Squeeze a handful. If water drips out, it's too wet. Add more perlite.
Step 3: Place the Cuttings
Lay the leaves flat on the surface. Don't bury them. Just press them gently into the medium. The base should be in contact with the soil. The tip can stick up a bit.
Step 4: Create Humidity
Cover the tray with a clear plastic dome or a plastic bag. This traps moisture. Place the tray in bright, indirect light. No direct sun. Temperature should be between 65-75°F (18-24°C).
Step 5: Wait and Watch
Check every few days. The leaves should stay moist. If the medium dries out, spray with distilled water. Don't soak it. After 1-2 weeks, you'll see roots and tiny plantlets.
Step 6: Pot the Plantlets
When the plantlets have 2-3 leaves and roots about half an inch long, they're ready to pot. Use a small pot (2-3 inches) with drainage holes. Fill with the same peat-perlite mix. Water with distilled water, then place in bright indirect light.
The RHS and AHS Support
I checked with the Royal Horticultural Society (RHS) and the American Horticultural Society (AHS) for their views. The RHS recommends using distilled water and avoiding fertilizer for carnivorous plants. They also suggest keeping humidity high during propagation. The AHS emphasizes the importance of light and moisture balance. Both organizations agree that leaf pullings are the most reliable home propagation method. I followed their advice and it worked.
Why Multi-Variety Propagation Matters
I love having different butterwort varieties. Each one has unique leaf shapes and flower colors. Pinguicula moranensis has broad leaves and pink flowers. Pinguicula gigantea has huge leaves that can trap larger insects. Pinguicula primuliflora produces multiple flowers on one stem. Pinguicula cyclosecta has purple flowers and compact leaves. Propagating them all together saves time and space. You learn which varieties are easy and which are tricky. For example, Pinguicula primuliflora is more sensitive to rot. Pinguicula gigantea is slower but more resilient.
Common Problems and Solutions
Problem: Leaves Rotting
Solution: Reduce humidity. Remove the dome for a few hours each day. Make sure the medium isn't too wet. If the leaf is fully rotten, remove it to prevent spread.
Problem: No Roots After Two Weeks
Solution: Check the temperature. If it's too cold, roots won't form. Move the tray to a warmer spot. Also, make sure the leaf is in contact with the medium. If it's lifted, press it down gently.
Problem: Plantlets Growing Slowly
Solution: Increase light. But not too much. Use a grow light if natural light is weak. Also, check the humidity. If the air is too dry, the plantlets will struggle.
Problem: Mold on the Soil
Solution: Remove the dome for longer periods. Increase air circulation. Use a fan on low speed. If mold persists, scrape it off and replace the top layer of medium.
My Personal Takeaways
I've killed more plants than I'd like to admit. But every failure taught me something. The biggest lesson is patience. Butterworts are slow growers. Don't expect instant results. The second lesson is consistency. Once you find the right conditions, don't change them. The third lesson is observation. Check your plants daily. Look for signs of stress. Adjust accordingly.
I also learned that each variety has its own personality. Pinguicula moranensis is the easiest. Pinguicula cyclosecta is a close second. Pinguicula gigantea is rewarding but slow. Pinguicula primuliflora is the diva. It needs extra care. I respect that now.
FAQs
Q: Can I propagate butterwort from seeds?
Yes, but it's harder. Seeds need stratification and constant humidity. Leaf pullings are easier and faster for home growers. I've tried seeds twice. Both times, the seedlings died. I stick to leaf pullings now.
Q: How often should I water cuttings?
Only when the medium feels dry. I check every two days. If the surface looks dry, I spray lightly. If it's still moist, I leave it. Overwatering is the main cause of failure.
Q: When can I transplant the new plantlets?
When they have 2-3 leaves and roots at least half an inch long. This usually takes 3-4 weeks. Don't rush it. The plantlets need time to establish. I wait until they look sturdy.
Final Thoughts
Propagating butterworts is a game of patience and attention. I've shared my real experiences, including the mistakes. I hope this helps you avoid the same pitfalls. Start with one variety. Master it. Then move to multi-variety propagation. You'll learn more with each attempt. And remember, the RHS and AHS have great resources. Use them. I do.





