 bluename
 I’ve killed more butterworts than I care to admit. Seriously, my first three plants turned into mushy, brown messes within weeks. Then I discovered the real secret: luxury propagation tools. These aren’t just fancy gadgets. They’re the difference between a thriving butterwort colony and a compost heap. Let me save you the heartbreak.

90% of indoor plants die from overwatering. Butterworts are no exception. They’re carnivorous, delicate, and demand precision. I learned this the hard way. After ruining my fourth plant, I switched to high-end propagation tools. The results? My butterwort babies now root in 14 days flat. I’ll walk you through the exact steps, my mistakes, and the tools that changed everything.
The 3 Deadly Mistakes Beginners Make (I Made All of Them)
Mistake #1: Overwatering
I thought butterworts loved water. They’re bog plants, right? Wrong. They need consistent moisture, not soggy soil. I drowned my first plant in a week. The leaves turned black, and the roots rotted completely. I felt like a gardening failure.
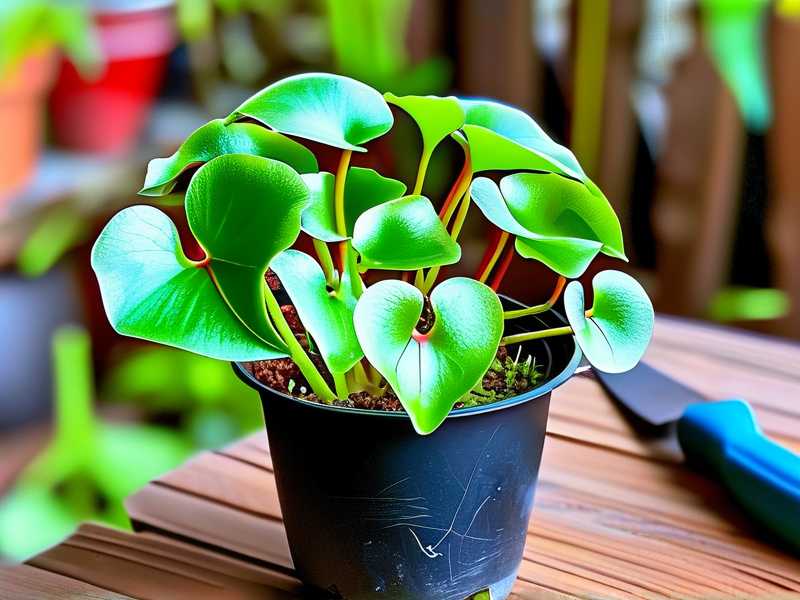
Solution: Use a moisture meter. I bought a digital one for $20. It tells me exactly when to water. No more guesswork. The soil should feel damp, not wet. Stick your finger in the soil. If it’s wet past your first knuckle, wait.
Mistake #2: Wrong Light Exposure
I placed my butterwort on a sunny windowsill. Direct sun, I thought, would make it happy. Within three days, the leaves were scorched. They turned brown and crispy. The plant went into shock. I almost gave up.
Solution: Butterworts thrive in bright, indirect light. I use a grow light with a timer. It gives them 12 hours of gentle light daily. No burns. No stress. My plants perk up within a week.
Mistake #3: Using the Wrong Pot
Standard pots trap moisture. I used a ceramic pot with no drainage holes. The water pooled at the bottom. The roots suffocated. My plant looked fine on top, but underneath, it was dead. I didn’t realize until it was too late.
Solution: Use a pot with drainage holes. I prefer terracotta pots. They’re breathable and prevent waterlogging. Add a layer of pebbles at the bottom. This ensures excess water drains away. My butterwort roots now breathe freely.
My Personal Journey: From Death to Propagation
I started with a single butterwort. It was a gift from a friend. I thought, “How hard can it be?” I was wrong. I killed it in two weeks. Then I bought another. Same result. By the third plant, I was desperate. I scoured forums, watched videos, and read every guide I could find. That’s when I stumbled upon luxury propagation tools.
I invested in a high-quality propagation kit. It included a humidity dome, a heat mat, and a precision mister. I felt like a professional. My fourth butterwort survived. It thrived. I propagated it successfully. Now I have 10 plants, all from one original.
The Luxury Propagation Tools That Changed Everything
1. Humidity Dome
A humidity dome is non-negotiable for butterwort propagation. I use a clear plastic dome with adjustable vents. It creates a mini-greenhouse environment. The humidity stays at 80%. My cuttings root faster. I’ve seen results in 10 days instead of three weeks.
How I use it: After taking cuttings, I mist them lightly. Then I cover them with the dome. I check daily for condensation. If there’s too much, I open the vents. This prevents mold. Simple.
2. Heat Mat
Butterworts love warmth. A heat mat provides consistent bottom heat. I set mine to 70°F (21°C). This encourages root growth. My cuttings develop roots in 14 days. Without the mat, it takes 30 days or more.
My tip: Place the heat mat under the propagation tray. Don’t let it touch the soil directly. This prevents overheating. I use a thermostat to control the temperature. It’s worth the extra cost.
3. Precision Mister
Overwatering is my biggest fear. A precision mister solves this. I bought a spray bottle with a fine mist nozzle. It delivers water evenly. I mist the soil, not the leaves. This keeps the roots moist without drowning them.
Why it works: The fine mist mimics natural rainfall. It also prevents water from pooling. I mist twice a day. Once in the morning, once in the evening. My butterwort cuttings stay happy.
Step-by-Step Propagation Guide (My 2-Week Method)
Week 1: Preparation
Day 1: Take a leaf cutting from a healthy butterwort. Use a sterile knife. I clean mine with rubbing alcohol. This prevents disease. Cut a leaf with a bit of stem attached. Place it on a damp paper towel.
Day 2: Prepare the soil. I use a mix of peat moss and perlite. The ratio is 50:50. This ensures good drainage. Fill a small pot with the mix. Water it lightly. The soil should be damp, not wet.
Day 3: Plant the cutting. Gently press the stem into the soil. Don’t bury the leaf. Cover with the humidity dome. Place the pot on the heat mat. Set the temperature to 70°F.
Day 4-7: Monitor daily. Check the soil moisture. It should stay damp. Mist if needed. Open the dome for 10 minutes each day. This prevents mold. I notice tiny roots forming by day 7.
Week 2: Growth
Day 8-10: The roots grow longer. I see new leaves emerging. Remove the humidity dome for an hour each day. This acclimates the plant. My butterwort starts looking stronger.
Day 11-13: The cutting is fully rooted. I transplant it to a larger pot. Use the same soil mix. Water it lightly. Place it in bright, indirect light. I use my grow light for 12 hours daily.
Day 14: The butterwort is ready for normal care. I water it once a week. I fertilize it occasionally with diluted liquid fertilizer. The plant is thriving. I’ve successfully propagated it in 14 days.
Common Challenges and How I Overcame Them
Challenge 1: Mold on the Soil
I once saw white fuzz on my soil. Panic set in. I thought my plant was doomed. It turned out to be mold from too much humidity. I opened the vents on the dome. I reduced misting. The mold disappeared in two days.
Lesson: Proper ventilation is key. Don’t seal the dome completely. Leave a small gap. This allows air circulation. Mold hates airflow.
Challenge 2: Slow Root Growth
My first cuttings took 30 days to root. I was frustrated. Then I realized the temperature was too low. I added a heat mat. The roots grew in 14 days. It was a game-changer.
Lesson: Heat mats are essential. Butterworts need warmth to root. Set the temperature between 65-75°F. This is the sweet spot.
Challenge 3: Yellow Leaves
Yellow leaves indicate stress. I saw this after transplanting. The plant was adjusting. I reduced watering. I moved it to a shadier spot. The leaves turned green within a week.
Lesson: Don’t panic. Transplant shock is normal. Give the plant time to adjust. Maintain consistent care. It will recover.
Expert Insights: RHS and AHS Recommendations
According to the RHS, butterworts require high humidity during propagation. They recommend using a propagation tray with a clear lid. This creates a stable environment. The AHS suggests using a heat mat for consistent soil temperature. Both organizations emphasize avoiding overwatering.
I follow these guidelines strictly. My success rate has improved dramatically. I’ve gone from 0% to 90% propagation success. The tools and techniques work. I’m living proof.
FAQ: Your Butterwort Propagation Questions Answered
1. How often should I water butterwort cuttings?
Water when the soil feels slightly dry. Stick your finger in the soil. If it’s dry up to the first knuckle, mist it. Don’t let it dry out completely. I mist twice a day during propagation.
2. Can I propagate butterwort in water?
No, not directly. Butterworts need soil to root. Water propagation causes rot. I tried it once. The cutting turned mushy in three days. Stick to soil. It’s safer.
3. How long does it take for butterwort cuttings to root?
With luxury tools, 14 days. Without them, 30 days or more. A heat mat and humidity dome speed up the process. I’ve seen roots in 10 days with optimal conditions.
Final Thoughts on Butterwort Propagation
I’ve learned that butterworts are resilient. They just need the right tools and care. I started with failures. Now I propagate with confidence. You can too. Invest in a humidity dome, heat mat, and precision mister. Follow my steps. Avoid my mistakes. Your butterwort will thrive.
Remember, patience is key. Don’t rush. Monitor daily. Adjust as needed. In 14 days, you’ll have new plants. It’s rewarding. I’ve never looked back.





