bluename
 How to Prune Pinguicula Properly for Growth
You want to prune your Pinguicula the right way. Honestly, the quick answer is: remove only dead or dying leaves at the base, using sterilized tweezers, and do it when the plant enters its winter dormancy phase. I learned this after killing my first three butterworts. It's not complicated once you know what to avoid.
Let me walk you through everything I've figured out. I have been growing Pinguicula for the past four years, and I have killed more than I'd like to admit. I know exactly what works and what doesn't.
My Starting Point: Why I Started Pruning
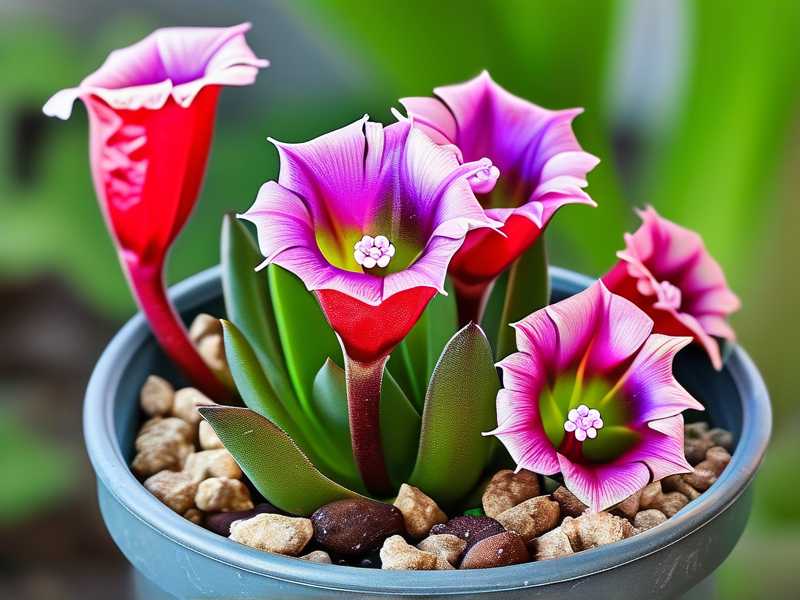
I remember my first Pinguicula. It was a beautiful Pinguicula moranensis. The leaves looked dewy and sticky. I was excited.
Then the bottom leaves turned brown and mushy. I thought the plant was dying. So I did what most beginners do. I ignored it.
Big mistake.
The dead leaves attracted fungus gnats and mold. Within two weeks, the whole plant collapsed. I felt terrible. I had no clue that pruning was even a thing for carnivorous plants.
Now I prune every Pinguicula I own. My collection has grown to about 15 different species. And I honestly believe proper pruning is the single most underrated skill for keeping these plants healthy.
The 3 Deadly Mistakes Beginners Make (I Made All of Them)
Before I tell you how to prune, let me save you the pain I went through. Let me share the mistakes that killed my first few plants.
① Overwatering: The Silent Killer
I cannot stress this enough. Here is a fact that shocked me when I first heard it: 90% of indoor plants die from overwatering. I was one of those people.
I used to water my Pinguicula every single day. I thought they needed constant moisture like other carnivorous plants. I was wrong.
My plant sat in soggy soil for two weeks. The roots started rotting. The leaves turned yellow and translucent. By the time I noticed, it was too late.
What I learned: Pinguicula are different from Venus flytraps. They need the soil to dry out slightly between waterings during their active growth phase. During winter dormancy, they need even less water.
The fix: I now water from the bottom. I fill a tray with distilled water and let my plants soak it up for about 20 minutes. Then I empty the tray completely. This keeps moisture balanced without drowning the roots.
② Light Misplacement: Too Much Shade
My second biggest mistake was putting my Pinguicula on a bookshelf in my living room. It looked nice. But it got maybe 2 hours of indirect light per day.
Within three weeks, the plant became leggy. The leaves stretched out like they were reaching for something. The dewdrops disappeared. The plant stopped catching gnats.
I moved it to a south-facing windowsill. Within two days, the leaves started producing dew again. But the damage was already done. I had to prune away the deformed leaves.
What I learned: Pinguicula need bright, indirect light for at least 6-8 hours daily. Direct morning sun is okay. Afternoon sun can burn them. Without enough light, they lose their sticky dew and become weak.
The fix: I now use a grow light during winter months. It is a simple LED panel with a timer. My plants get 10 hours of light per day. They stay compact and dewy all year round.
③ Wrong Pot Type: The Drainage Trap
This one is embarrassing. I bought a cute ceramic pot from a local shop. It had no drainage holes. I thought I was being clever by adding a layer of pebbles at the bottom.
Two weeks later, my plant was sitting in a puddle. The pebbles did nothing. The roots suffocated.
What I learned: Pinguicula need pots with excellent drainage. Plastic pots with multiple drain holes are best. Terracotta pots can work, but they dry out too quickly for some species.
The fix: I now use net pots or standard plastic nursery pots. I place them inside decorative outer pots. This way, water drains fully, and the plant never sits in wet soil. The RHS recommends this method for most carnivorous plants.
When to Prune: Timing Is Everything
Timing makes or breaks your pruning success. I had to learn this the hard way.
Active Growth Phase (Spring to Summer)
This is not the best time for heavy pruning. Your plant is actively growing and producing new leaves. Pruning during this phase can stress the plant.
I only remove leaves that are clearly dead or rotting. I do this once every two weeks. I remove maybe one or two leaves per session.
Dormancy Phase (Fall to Winter)
This is your golden window. As growth slows down, many older leaves will naturally die off. This is when I do the bulk of my pruning.
I prune once at the start of dormancy. Then I check again after two weeks. Usually, I remove 5-8 leaves total. The plant looks much cleaner.
What I Did Wrong: Pruning at the Wrong Time
I once pruned my Pinguicula in the middle of July. I removed several healthy green leaves. I thought I was helping it grow bushier.
The plant went into shock. It stopped producing new leaves for almost a month. I felt so stupid.
What I learned: Never remove healthy leaves. Only remove leaves that are more than 50% dead. Green leaves are still photosynthesizing and feeding the plant.
My Step-by-Step Pruning Process
Let me show you exactly what I do. I have refined this method over the past two years. It works every time.
Tools I Use
- Sterilized tweezers: I soak them in rubbing alcohol for 10 minutes before each use
- Small scissors: Only for cutting stubborn stems
- Paper towel: To catch fallen leaves
- Distilled water spray: To mist the plant after pruning
Step 1: Inspect the Plant
I look at each leaf carefully. Dead leaves are easy to spot. They turn brown, yellow, or mushy. They might also have mold spots.
I check the base of each leaf where it connects to the main stem. That is where rot usually starts.
Step 2: Remove Dead Leaves
I use my tweezers to gently grip a dead leaf near its base. I pull it downward and outward at a slight angle. The leaf should come off cleanly.
If it resists, I use scissors to cut it as close to the base as possible. I never yank hard because that can damage the crown.
Step 3: Trim Damaged Leaf Edges
Sometimes only the tip of a leaf is dead. I do not remove the whole leaf. I use scissors to trim just the damaged part.
I cut at a 45-degree angle. This helps water run off instead of pooling on the cut surface.
Step 4: Clean the Area
I use my tweezers to pick up any dead leaf fragments from the soil. These fragments can rot and attract pests.
I spray the plant lightly with distilled water. This helps dust settle and cleans any sap residue.
Step 5: Wait Two Weeks
This is the most important part. I do not prune again for at least two weeks. The plant needs time to heal and redirect energy.
After two weeks, I inspect again. Usually, a few more leaves have died off. I repeat the process.
My observation: After that two-week period, my Pinguicula always produces at least one or two new leaves. The new leaves are usually darker green and have more dew. The plant looks fuller and healthier.
What to Do with Pruned Leaves
Do not throw them in your regular trash or compost. Here is why.
Donor Leaves for Propagation
Healthy pruned leaves can become new plants. I have propagated dozens of Pinguicula using this method.
I take a healthy leaf and lay it flat on moist sphagnum moss. I keep the moss damp and covered with a plastic dome. After 4-6 weeks, tiny plantlets form at the base of the leaf.
This is a great way to expand your collection for free.
Dispose of Diseased Leaves
If a leaf shows signs of mold or rot, I throw it away immediately. I do not use it for propagation. I also sterilize my tweezers after handling diseased leaves.
I learned this after losing a plant to a fungal infection. The disease spread from one dead leaf to the entire plant in just one week.
How Pruning Affects Growth: My Experience
Let me be real. I did not believe pruning would help at first. I thought plants should just be left alone.
But I changed my mind after a specific experience.
I had a Pinguicula that was struggling. It had about 20 leaves, but 12 of them were brown and sad. The plant was not catching any insects. It looked terrible.
I decided to prune out all the dead leaves. I removed 12 leaves total. The plant looked almost naked. I felt nervous.
After two weeks: The plant had pushed out 4 new leaves. The new leaves were bright green and covered in sticky dew. It started catching fruit flies again.
After one month: The plant had doubled its number of healthy leaves. It was catching more gnats than ever.
That was the moment I became a believer.
Common Questions About Pruning Pinguicula
FAQ 1: Can I prune my Pinguicula during winter dormancy?
Yes, absolutely. In fact, winter dormancy is the best time for pruning. I prune mine around November when growth slows down. I remove all dying leaves. This prevents rot during the cold months when the plant is less active.
FAQ 2: What happens if I accidentally cut a healthy leaf?
Do not panic. A single cut leaf will not kill the plant. The leaf will likely start to dry from the cut point. If this happens, just remove that leaf during your next pruning session. I have done this before. The plant recovered fine within two weeks.
FAQ 3: Do I need to repot after pruning?
Not always. Pruning and repotting are separate tasks. I only repot when the soil breaks down or the plant outgrows its pot. If you prune and repot at the same time, you stress the plant too much. Space these activities at least one month apart.
The Role of Light and Water after Pruning
Pruning is not a magic fix on its own. You need to adjust care after pruning to support new growth.
Light Adjustment
After pruning, I keep my plant in bright indirect light. I do not move it to a darker spot. The remaining leaves need light to photosynthesize and produce energy.
I use a grow light set to 10 hours per day. This ensures consistent light even on cloudy days. The AHS suggests that consistent light helps plants recover faster from pruning.
Water Adjustment
I water slightly less for the first week after pruning. The plant has fewer leaves, so it loses less water through evaporation. Overwatering after pruning can lead to root rot.
I check the soil moisture every three days. I water only when the top inch of soil feels dry.
Temperature and Humidity
Pinguicula prefer temperatures between 60-80°F. I keep my pruned plants in a spot with good air circulation. A small desk fan helps prevent mold growth.
Humidity should be around 40-60%. I mist my plants every morning after pruning. This helps the leaves recover and prevents dehydration.
Long-Term Maintenance: My Routine
I have found that consistency is the key to success. Here is my current routine.
Weekly Checks
Every Sunday, I inspect all my Pinguicula. I look for:
- Dead or dying leaves
- Mold spots
- Pest signs
- Soil moisture
I remove any dead leaves immediately. I do not wait for a full pruning session.
Bi-Weekly Pruning
Every two weeks, I do a deeper pruning session. I remove all leaves that are more than 50% brown. I also trim any damaged leaf tips.
Seasonal Deep Pruning
Twice a year, I do a heavy prune. Once in early autumn before dormancy. Once in early spring when growth resumes.
During these sessions, I remove up to 30% of the leaves. The plant always bounces back stronger.
What Experts Say
I have read extensively on this topic. The RHS states that regular pruning of dead foliage helps prevent fungal infections and promotes airflow. This is especially important for Pinguicula varieties that form tight rosettes.
The AHS emphasizes the importance of using sterilized tools for pruning any carnivorous plant. Dirty tools can introduce bacteria into cut tissues.
I follow both recommendations. My plants have not had a single fungal infection since I started using sterilized tweezers.
Final Thoughts from My Experience
I killed three Pinguicula before I figured out pruning. I had the same doubts you probably have. Is it worth the effort? Will I hurt my plant?
Let me be clear. Pruning is not optional. It is a basic care requirement.
A pruned Pinguicula will:
- Grow faster
- Produce more dew
- Catch more insects
- Survive dormancy better
- Stay disease-free
If you take one thing from this guide, let it be this: start small. Remove one dead leaf. Wait two weeks. See what happens. I promise you will see the difference.
I still prune every plant in my collection. Every two weeks. Without fail. It takes me less than five minutes per plant. The results speak for themselves.
Your Pinguicula wants to grow. It just needs a little help from you.