 bluename
 How to Propagate Butterwort: Temperature Guide for Leaf Pullings, Divisions, and Seeds
Here's the answer up front. If you want butterwort propagation to actually work, hold your growing area between 68°F and 75°F (20°C to 24°C). That's the sweet spot where leaf pullings strike fast, divisions settle in, and fresh seed germinates. Drop below 60°F (16°C) and everything stalls. Push past 85°F (29°C) and you're looking at rot, dried-out leaves, and a very quiet propagator.
I learned that the expensive way. I've killed more butterworts than I want to admit, mostly because I treated them like ordinary houseplants. They're not. Once I started thinking of temperature as the main control knob and everything else as support, my success rate went from "maybe one leaf out of six" to "almost every pulling makes babies."
So let's talk about how to do this properly.
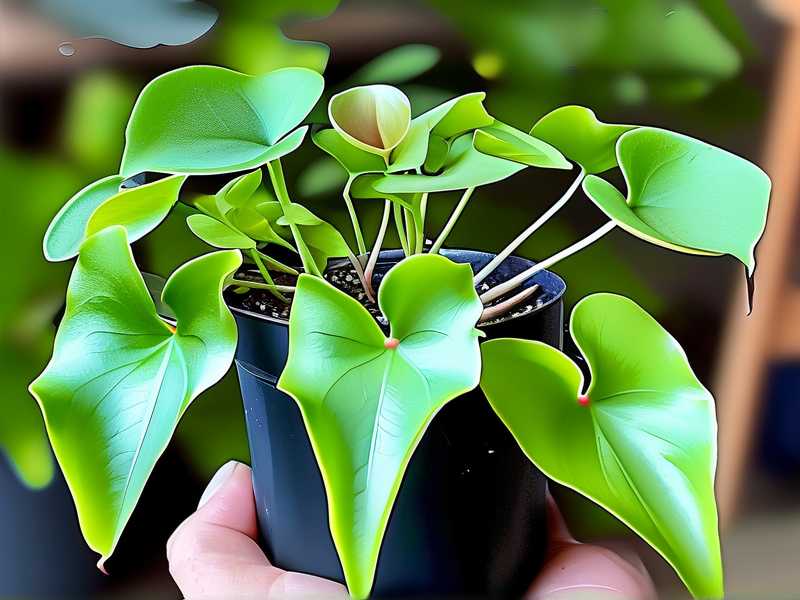
Why Butterworts Are Worth the Small Extra Effort
Butterwort is the common name for Pinguicula, a genus of carnivorous plants with soft, greasy-feeling leaves. Those leaves catch fungus gnats, fruit flies, and tiny mosquitoes, which is honestly why half of us buy them in the first place.
They stay small, they look tidy on a windowsill, and most of the Mexican species grow happily indoors year-round. The difficulty level is moderate, not hard. It's just unfamiliar.
The RHS lists Pinguicula among the carnivorous plants suited to frost-free cultivation, and the AHS notes that most failures with carnivorous plants come down to water quality and temperature, not some mysterious "green thumb" issue. That matches what I've seen over years of growing them.
What Temperature Actually Does During Propagation
Temperature controls three things at once.
First, it drives cell division at the base of the leaf. Warmth speeds it up. Cold slows it to zero.
Second, it determines how fast your growing medium dries out. A 10-degree swing changes your watering schedule completely.
Third, it decides whether rot organisms get the upper hand. Damp and cold is the worst combination. Damp and warm with airflow is fine.
My working range for leaf pullings is 68°F to 75°F during the day, dropping no lower than 65°F at night. A slight nighttime drop is good. A big one is not.
My Two-Week Leaf Pulling Log
I'll walk you through exactly what I did, because vague advice is useless.
Setup. I filled a small plastic pot with a mix of one part peat, one part perlite, one part vermiculite. I moistened it with distilled water until it felt like a wrung-out sponge.
The pull. I chose a healthy outer leaf from a Pinguicula moranensis and pulled it downward, slowly, until it came away with the white base intact. That white bit is the heel, and if you snap it off, the pulling usually fails.
Placement. I laid the leaf flat on the surface, heel touching the medium, and did not bury it.
Humidity. I put a clear plastic cup over the pot, propped up slightly on one side for air exchange. Humidity stayed around 70%.
Light. Bright, indirect light from a south-facing window with a sheer curtain. No direct sun.
Temperature. I held the shelf at 70°F to 72°F using a small heat mat on a thermostat.
Now the timeline.
Days 1 to 3: Nothing visible. The leaf stays plump. If it goes limp and gray, your temperature is too low or the medium is too dry.
Day 5: Slight curl at the leaf tip. That's normal. I used to panic at this stage and move things around, which is the worst thing you can do.
Day 9: Tiny green bumps appeared at the heel, roughly a millimeter across. This is where temperature really pays off. At 62°F, those bumps never showed up.
Day 14: Clear plantlets, two to three millimeters, each with a few tiny leaves. That's when I started lifting the humidity dome for an hour a day.
The contrast batch is worth mentioning. I ran the same process on a windowsill that dipped to 60°F at night. After two weeks there was nothing. After five weeks, two leaves had molded over. Same medium, same water, same light. Temperature was the only variable.
Light: Bright and Filtered, Every Time
Direct midday sun will cook a butterwort, especially a young pulling with almost no root system. Morning sun is fine. All-day filtered light is better.
What I aim for is bright, indirect light for 12 to 14 hours. A sheer curtain over a south or west window does the job. So does a small LED grow light kept 8 to 12 inches above the plants.
Too little light and your plants go pale green, stretch, and stop producing the sticky dew that makes them carnivorous. Too much and you get scorched patches and crispy leaf edges, usually within a day. If you see browning start on the leaf surface, move the pot first and ask questions later.
Watering a Carnivorous Plant Without Drowning It
You've probably heard that 90% of indoor plants die from overwatering. That stat gets thrown around a lot, and butterworts are a strange exception that still proves the rule. They want constant moisture, but they absolutely do not want stagnant, oxygen-poor water around their roots.
The tray method is what I use. I stand the pot in a shallow tray with about half an inch of water and let it drink. When the tray is dry, I wait a day, then refill.
Water quality matters as much as quantity. Use distilled, rain, or reverse osmosis water. Tap water leaves mineral deposits that slowly poison the plant. I keep a cheap TDS meter and aim for under 50 parts per million.
During active growth in summer, I might water every two to three days. In the winter rosette phase, I let the tray stay dry for longer stretches and only water lightly around the pot edge.
If the base of the plant turns black and soft, that's rot. Unpot it, cut away the mushy tissue, dust the wound with sulfur, and repot into fresh, barely moist medium.
Soil and Pots: Small Choices, Big Consequences
Butterworts want a lean, airy, slightly acidic mix. Mine is one part peat moss, one part perlite, one part vermiculite. Some growers swap the vermiculite for coarse sand. Either works.
Never use potting soil with fertilizer pellets. Never use compost. The nutrients burn the roots.
For pots, plastic or glazed ceramic is the way to go. I avoid unglazed terracotta entirely for these plants. It wicks moisture away fast, and it leaches minerals into the medium over time. That's mistake number three on my list below, and it cost me a nice Pinguicula esseriana.
Repotting happens in early spring, right as new growth starts. I do it every 12 to 18 months, or whenever the medium looks compacted or smells sour. Divisions come out of that same session.
Do You Ever Fertilize a Butterwort?
Gently, and rarely. That's the honest answer.
These plants get most of their nutrition from the insects they catch. Heavy feeding is the fastest way to burn the leaves. What I do instead is spray a quarter-strength foliar fertilizer, something like a 16-16-16 orchid formula at a quarter teaspoon per gallon, once a month during active growth. I spray the leaves lightly in the evening and never pour it into the soil.
I skip feeding entirely during the winter rosette phase. The plant isn't growing, so the fertilizer just sits there and causes problems.
The Seasonal Temperature Calendar
This is the part that separates people who keep butterworts alive for years from people who replace them every spring.
Spring: Waking Up and Multiplying
Once days lengthen and indoor temperatures sit reliably around 65°F to 75°F, your butterwort breaks dormancy and starts producing carnivorous leaves again.
This is my main propagation window. Leaf pullings, divisions, and repotting all happen now.
I trim off any dead winter leaves with clean scissors. I start the monthly dilute foliar feed. And I take more leaf pullings than I need, because a few always fail.
Summer: Managing Heat
Mexican butterworts handle warmth well up to about 85°F. Above that, they slow down and can go into a stress dormancy that looks a lot like rot.
If your home gets hot, move pots off sunny windowsills and increase airflow with a small fan on low. Raise humidity if you can. Keep the tray filled but never let pots sit in water for days on end.
Watch for fungus gnats. They're annoying, but the larvae chew on roots and stems. A layer of sand on the soil surface helps a lot.
Autumn: Slowing Down on Purpose
Around October, Mexican species start shifting into their winter rosette. The sticky leaves shrink back and a tight, succulent-looking rosette forms.
That's your signal to cut back. Reduce watering, stop fertilizing, and let the plant dry slightly between waterings. Temperatures around 55°F to 65°F suit this phase perfectly.
Clean up any dying leaves so mold doesn't get a foothold.
Winter: Cool, Dry, and Boring on Purpose
The winter rosette needs a rest. Cooler temperatures, less water, and no fertilizer. I keep mine at 55°F to 65°F, which for me means a cool bedroom windowsill.
Do not propagate during this window. I tried it once, in January, on a rosette that looked perfectly healthy. Two months later, nothing had happened and the leaves had shriveled. The plant simply wasn't in a state to make babies.
If you grow temperate species like Pinguicula vulgaris, the rules flip. Those need a genuinely cold winter, around 35°F to 45°F, often outdoors or in a cold frame.
Three Beginner Mistakes That Kill Butterworts
Mistake one: overwatering. Not "too much water" in a vague sense, but constant standing water with no oxygen and no airflow. Roots suffocate, then rot. Use the tray method, let it dry between refills, and always use mineral-free water.
Mistake two: light in the wrong place. A full-sun south window will scorch them. A dark corner will turn them pale and dewless. Bright, filtered, consistent light is the goal.
Mistake three: the wrong pot. Unglazed terracotta dries too fast and leaches minerals. I lost a beautiful Pinguicula esseriana to a terracotta pot before I figured this out. Plastic or glazed ceramic, every time.
Pests, Rot, and Yellow Leaves: Quick Fixes
Yellow leaves, lower ones: could be normal aging, could be too much water. Check the medium moisture and the base of the stem first.
Crispy brown edges: usually low humidity or a hot, bright spot. Move it and raise humidity.
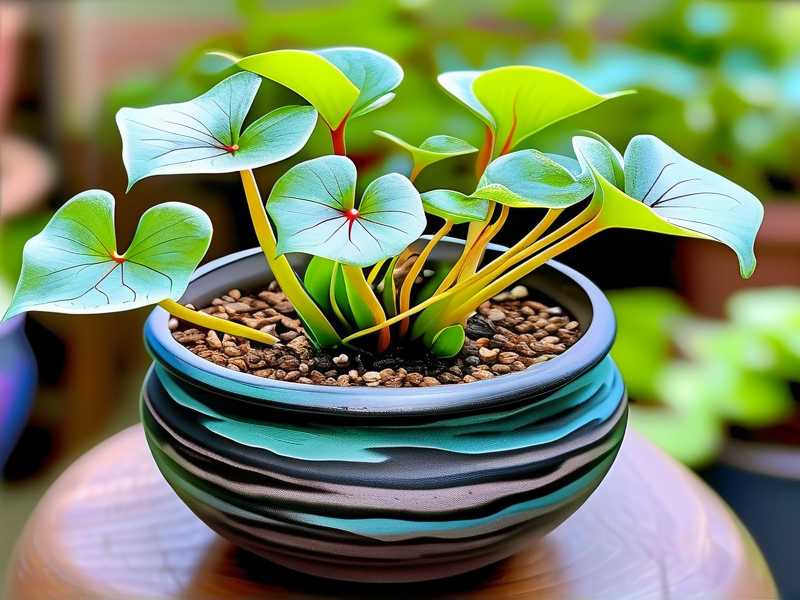
Black, mushy base: rot. Act fast. Unpot, clean, repot in fresh mix.
Gray fuzz on leaves: botrytis, a mold that shows up when humidity is high and air is still. Increase airflow and remove affected leaves.
Mealybugs and aphids: wipe them off with a cotton swab dipped in rubbing alcohol, then rinse the plant with distilled water.
Fungus gnat larvae: let the top layer of medium dry slightly, add a sand top dressing, and use sticky traps for the adults.
Questions I Get Asked a Lot
Can I propagate butterwort in water? You can, but I don't recommend it. Leaves rot easily in standing water, and the roots that form are fragile. Damp medium with high humidity gives much better results.
How long until I see new plants from a leaf pulling? At 68°F to 75°F, expect visible bumps around day 9 and real plantlets by two weeks. Below 65°F, everything slows down dramatically.
Do I need a heat mat? Only if your room runs cold, below about 65°F. A thermostat-controlled mat set to 72°F solved the problem for me.
Butterwort propagation isn't complicated once you understand that temperature is doing most of the work. Get the warmth right, keep the water clean, use the right pot and medium, and let the plant tell you when it's ready to grow. After that, it's mostly patience and resisting the urge to fiddle.





