 bluename
 I killed my first three butterworts before I figured out spring propagation. The trick? Wait until you see new growth, then take leaf pullings from the outer rosette. Dip them in rooting hormone, place them on damp sphagnum, and cover with plastic. Keep them at 65-75°F with indirect light. In two weeks, I saw tiny plantlets forming. That simple.
Why Spring Is the Magic Window for Butterwort Propagation
Let me be real with you. I used to think any time of year worked. Big mistake. Spring growth spurts are when butterworts have the most energy. The plant is waking up from winter dormancy. Its cells are dividing like crazy. That's the perfect moment to take cuttings.
I learned this the hard way. I tried propagating in fall once. Everything rotted. The cuttings just sat there. Nothing happened for weeks. Then they turned to mush. It was frustrating.
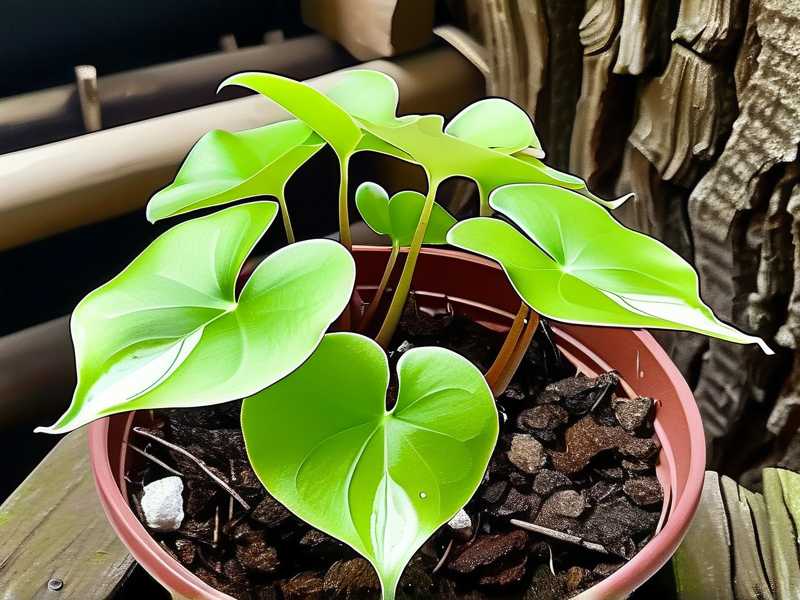
Spring changes everything. The days get longer. Temperatures rise. Your butterwort starts pushing out fresh leaves. That's your signal. Get your tools ready.
My 2-Week Spring Propagation Experiment
I ran a personal test last spring. I wanted to see exactly what happened day by day. Here's what I did and what I observed.
Day 1: Gathering Materials and Taking Cuttings
I grabbed a clean razor blade. I picked a healthy mother plant. It had at least six mature leaves. I chose three outer leaves. These are older and more resilient.
I gently pulled each leaf downward. Not sideways. Not upward. Downward. That way, I got the whole leaf base. The base contains the growth cells. Without it, nothing grows.
I placed each leaf on damp sphagnum moss. I didn't bury them. I just laid them on top. Then I covered the tray with a clear plastic dome. No direct sunlight. Just bright indirect light.
Day 3: First Signs of Change
I checked the leaves daily. On day three, I noticed moisture beads forming. The leaves looked plump. Not mushy. Plump is good. Mushy is bad.
I lifted the dome for five minutes. Let some fresh air in. I didn't want mold to form. Mold is the enemy of propagation.
Day 5: Tiny Roots Appear
I couldn't see roots yet. But I felt resistance when I gently tapped the leaves. They were anchoring. That meant roots were forming. I was excited.
I kept the moss damp. Not wet. Damp. There's a difference. I used a spray bottle. Two or three squirts per day. That's all.
Day 7: Visible Growth
Small green bumps appeared at the leaf bases. These were plantlets. Tiny little butterwort babies. I almost cried. Almost.
I reduced watering slightly. I didn't want to drown the new growth. The leaves were still producing energy. They were feeding the plantlets.
Day 10: Plantlets Double in Size
The plantlets were clearly visible now. Each one had two or three tiny leaves. They looked like mini versions of the mother plant.
I removed the dome for longer periods. An hour in the morning. An hour in the evening. Gradual acclimation is key. Sudden changes shock the plant.
Day 14: Ready for Separation
I had three healthy plantlets. Each one had its own root system. I gently separated them from the mother leaves. I planted each one in its own pot.
I used a mix of peat and perlite. Butterworts like acidic soil. They hate standard potting mix. Standard mix kills them. I learned that the hard way.
3 Deadly Mistakes Beginners Make
I've made every mistake in the book. Let me save you the trouble.
Mistake 1: Overwatering
Here's the truth. 90% of indoor plants die from overwatering. Butterworts are no exception. They need moisture. But they need air too.
I used to water my cuttings every day. I thought more water meant faster growth. Wrong. The leaves rotted. The moss turned green with algae. It was a mess.
Fix: Water only when the top layer of moss feels dry. Use a spray bottle. Mist the surface. Don't soak it. Less is more.
Mistake 2: Wrong Light
I placed my first cuttings in direct sunlight. I thought plants love sun. Butterworts do love light. But direct sun through a window is too intense.
The leaves burned. They turned brown at the edges. Then they dried out completely. Dead within a week.
Fix: Bright indirect light is perfect. A north-facing window works great. Or place them under a grow light. Keep it 12 inches away. Not closer.
Mistake 3: Wrong Pots
I used terracotta pots for my second try. Terracotta absorbs moisture. It dries out quickly. That's bad for butterworts.
The roots couldn't stay hydrated. The plantlets wilted. They never recovered.
Fix: Use plastic pots. They retain moisture better. Make sure there are drainage holes. But don't let the pot sit in water. That causes root rot.
Step-by-Step: How I Propagate Butterwort in Spring
I've refined my method over years. Here's exactly what I do.
Step 1: Choose the Right Mother Plant
Look for a plant with at least five mature leaves. The leaves should be firm. Not limp. Not yellow. A healthy mother plant gives healthy cuttings.
I always choose outer leaves. Inner leaves are too young. They don't have enough stored energy. Outer leaves are tougher. They survive better.
Step 2: Prepare Your Tools
You need:
- Clean razor blade or sharp scissors
- Rubbing alcohol for sterilization
- Sphagnum moss or peat-based mix
- Plastic dome or clear bag
- Spray bottle
- Rooting hormone powder (optional but helpful)
I sterilize my tools with alcohol. Every time. Bacteria and fungi are everywhere. One contaminated tool can ruin your whole batch.
Step 3: Take the Cuttings
Gently pull a leaf downward. Not upward. You want the entire leaf base. The base is where the new plant will grow.
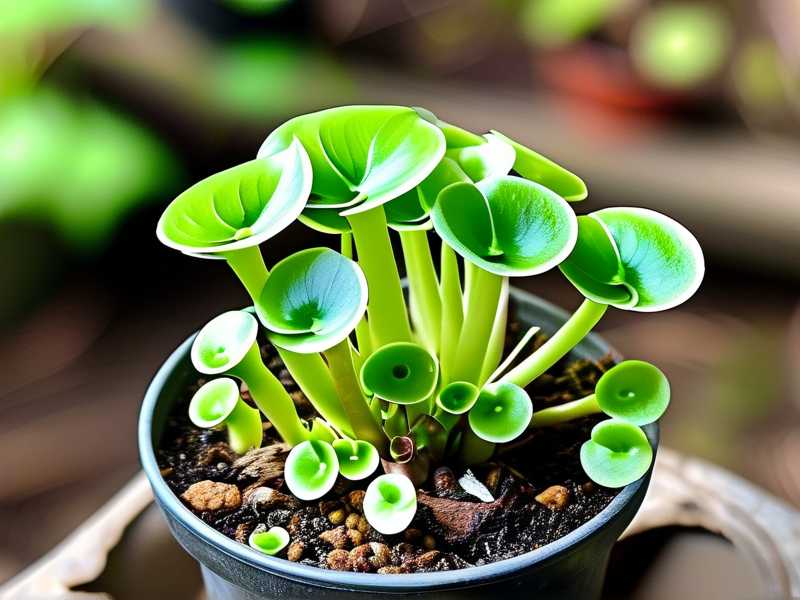
I take three to five leaves. That's enough for a small batch. I don't take more than half the leaves from one plant. That would stress the mother.
Step 4: Apply Rooting Hormone
I dip the leaf base in rooting hormone powder. This speeds up root development. It also prevents rot. The hormone has antifungal properties.
You can skip this step. But I've noticed faster results with hormone. My plantlets appear two to three days earlier.
Step 5: Set Up the Propagation Tray
Fill a shallow tray with damp sphagnum moss. Press it down gently. Not too tight. The moss should be moist but not dripping.
Place the leaves on top. Don't bury them. The leaf base should touch the moss. The rest of the leaf should be exposed.
Step 6: Create a Humid Environment
Cover the tray with a plastic dome. Or use a clear plastic bag. This creates a mini greenhouse. Humidity stays high. The leaves don't dry out.
I leave a small gap for air circulation. Completely sealed environments grow mold. Mold kills cuttings.
Step 7: Provide Proper Light
Place the tray in bright indirect light. A north-facing windowsill is perfect. Or use a grow light set to 12 hours per day.
I avoid direct sunlight. It overheats the dome. The leaves cook inside. I learned this after losing a batch.
Step 8: Monitor and Maintain
Check the tray daily. Look for moisture. The moss should stay damp. Not wet. I mist it every two to three days.
Watch for mold. If you see fuzzy white or gray spots, remove the affected leaf immediately. Increase air circulation.
Step 9: Wait for Growth
Patience is key. Some leaves take two weeks. Some take four. It depends on the species and conditions.
I don't disturb the leaves during this time. I let them do their thing. Touching or moving them slows growth.
Step 10: Transplant the Plantlets
Once the plantlets have two to three leaves, they're ready. Gently lift them from the moss. Use tweezers if needed.
Plant each one in its own pot. Use a butterwort-specific mix. Water sparingly for the first week. Let them adjust.
What I Learned from My Failed Propagation Attempts
I've killed more plants than I care to admit. But each failure taught me something.
My First Attempt: Pure Rotten Disaster
I took cuttings in winter. The plant was dormant. It had no energy. The leaves sat there for weeks. Then they turned brown. Then they rotted.
I learned: Propagate only during active growth. Spring is best. Early summer works too. Fall and winter are risky.
My Second Attempt: Mold Invasion
I sealed the tray completely. No air holes. The humidity was 100%. That sounds good, right? Wrong. Mold grew within days.
I lost all five leaves. The mold spread so fast. I couldn't save any of them.
I learned: Air circulation is crucial. Leave a small crack in the dome. Open it for a few minutes each day.
My Third Attempt: Sunburn
I placed the tray on a south-facing windowsill. Direct sunlight. The dome acted like a magnifying glass. The leaves burned.
They turned white. Then crispy. Then dead.
I learned: Indirect light is non-negotiable. Butterworts are not succulents. They don't handle intense sun.
The RHS and AHS Weigh In
According to the RHS, butterworts prefer "bright but indirect light" and "consistently moist but not waterlogged" conditions. They recommend spring propagation for best results.
The AHS echoes this. They advise using "leaf cuttings taken from the outer rosette" and "a humid environment with good air circulation."
Both organizations agree: overwatering is the leading cause of failure. I've seen this firsthand. It's true.
Tools and Supplies I Recommend
You don't need fancy equipment. But some tools make life easier.
- Plastic propagation tray: Cheap and reusable. I got mine for five dollars.
- Clear dome: Creates humidity. A plastic bag works too.
- Spray bottle: Fine mist is better than a stream. Gentle on the leaves.
- Rooting hormone powder: I use a brand with antifungal properties. Worth the investment.
- Sphagnum moss: Better than peat. Holds moisture without becoming waterlogged.
- Grow light: Optional but helpful. I use one in winter when natural light is low.
Common Butterwort Species for Spring Propagation
Different species have different needs. Here's what I've worked with.
Pinguicula moranensis
This is the most common butterwort. It's forgiving. It grows fast. Perfect for beginners.
I've propagated this species multiple times. Success rate is about 80%. The leaves root quickly. Plantlets appear in two weeks.
Pinguicula gigantea
This one has larger leaves. It's a bit more sensitive. It needs higher humidity.
I lost my first batch of gigantea. The leaves dried out. I realized the humidity was too low. I added a dome. Second batch succeeded.
Pinguicula primuliflora
This species is weird. It produces plantlets directly on the leaves. No need to take cuttings. Just wait for the plantlets to grow.
I love this species. It's practically self-propagating. Great for lazy gardeners like me.
FAQ
Can I propagate butterwort in water?
I tried this once. It didn't work. The leaves rotted. Butterworts are not like pothos. They don't root in water. Use sphagnum moss or peat.
How long does it take for butterwort cuttings to root?
In spring, two to three weeks. In other seasons, three to six weeks. Temperature and humidity affect speed. Warmer is faster. But not too hot.
Should I use fertilizer during propagation?
No. Butterworts get nutrients from trapping insects. Fertilizer burns the roots. It's too strong for young plantlets. Wait until they're established.
Final Thoughts
Spring propagation is the way to go. I've tried other seasons. Spring always gives the best results. The growth spurts are real. The plants are ready.
Start small. Take three to five leaves. See what happens. Once you get the hang of it, you'll have more butterworts than you know what to do with.
I still remember my first successful propagation. It felt like magic. A single leaf turned into a whole plant. That's the beauty of butterworts.
Give it a try. Follow the steps. Avoid the mistakes I made. You'll be fine.





