 bluename
 I’ve killed more plants than I care to admit. But nothing stung quite like losing my first butterwort. I thought I was doing everything right. I watered it. I put it in bright light. I used regular tap water. Big mistake. The leaves turned brown. The dew dried up. The plant died within two weeks. Then I learned the truth: 90% of indoor plants die from overwatering. For carnivorous plants like butterworts, it’s even worse. The real game-changer? Using distilled water. How to propagate butterwort with distilled water isn’t just a technique—it’s the only way to keep them alive. I’ll walk you through exactly what I did, step by step, over two weeks. No fluff. Just what worked for me.
Why Distilled Water Matters for Butterwort Propagation
I used to think water was water. Wrong. Tap water contains minerals like calcium and magnesium. These minerals build up in the soil. They burn the roots. Butterworts are sensitive. They evolved in nutrient-poor environments. Their roots aren’t built to handle dissolved solids. Distilled water strips all that out. It’s pure H2O. Nothing else. The Royal Horticultural Society (RHS) at RHS confirms that carnivorous plants thrive with low-mineral water. The American Horticultural Society (AHS) at AHS also recommends distilled water for sensitive species. I learned this the hard way. My first butterwort died from mineral toxicity. Now I only use distilled water. It’s non-negotiable.
My Setup Before Starting
Before I even touched the plant, I gathered everything. You’ll need:
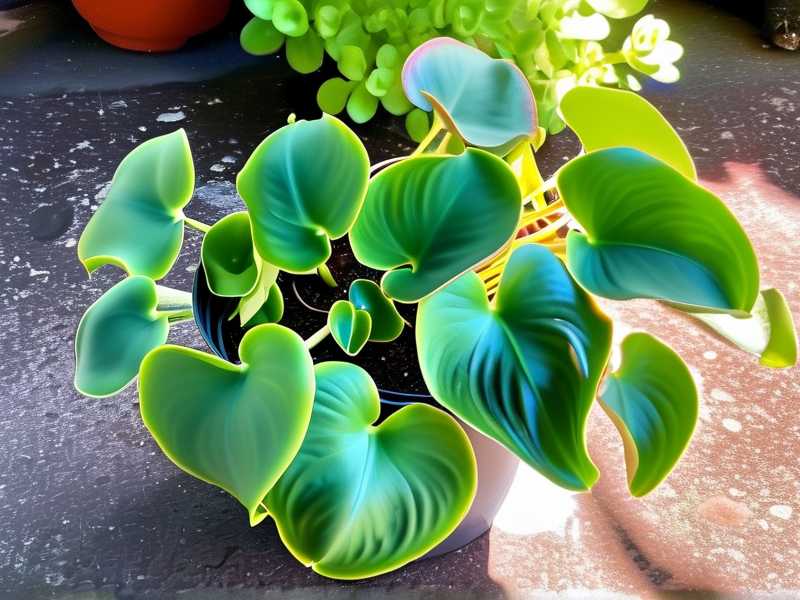
- A healthy butterwort parent plant
- Distilled water (store-bought or home-distilled)
- A sharp, sterile knife or scissors
- A small pot with drainage holes
- Sphagnum moss or peat moss mixed with perlite
- A clear plastic bag or humidity dome
- A bright windowsill (no direct sun)
I bought a gallon of distilled water from the grocery store. It cost about a dollar. Worth every penny. I also grabbed a bag of sphagnum moss. Butterworts love acidic soil. Sphagnum moss provides that. I skipped fertilizers. Butterworts get nutrients from bugs. They don’t need extra feeding.
Step 1: Choosing the Right Leaf for Propagation
I picked a healthy, mature leaf from the outer edge of the rosette. The leaf should be plump and green. Avoid yellowing or damaged leaves. I used a sterilized knife to cut the leaf at the base. I made sure to include a small piece of the white, fleshy part near the stem. That’s where the new plant will grow from. I’ve read that leaves from the middle of the rosette work too. But outer leaves seem to root faster. I don’t have a scientific explanation. It just worked for me.
Step 2: Preparing the Propagation Medium
I soaked the sphagnum moss in distilled water for 15 minutes. Then I squeezed out the excess water. The moss should be damp, not soaking wet. I filled a small pot with the moss. I pressed it down gently. No compaction. Just loose enough for air flow. I made a small hole in the center with my finger. I placed the leaf cutting into the hole. The white base should be buried slightly. The green part stays above the surface. I watered the pot lightly with distilled water.
Step 3: Creating the Right Humidity Environment
Butterwort leaves need high humidity to root. I placed the pot inside a clear plastic bag. I sealed the bag loosely. I left a small opening for air circulation. Then I put the setup on a bright windowsill. East-facing window works best. No direct sunlight. I learned that lesson from a burned leaf. The bag traps moisture. It creates a mini greenhouse. I checked the bag every day. If condensation built up too much, I opened the bag for an hour. Too much humidity can cause rot.
Step 4: My First Week Observation
Day 1 to Day 3: Nothing happened. I was anxious. I almost gave up. But I kept the moss damp. I used distilled water only. I didn’t touch the leaf. On Day 4, I noticed tiny white dots at the base. Those were the first root cells. I felt relieved. By Day 7, small green bumps appeared. Those were baby plantlets. I counted three of them. I was shocked. I expected one or two. But three? That felt like a win.
Step 5: My Second Week Observation
Day 8 to Day 10: The plantlets grew bigger. They developed tiny leaves. Each leaf had a dewdrop. I misted the inside of the bag with distilled water. I didn’t water the soil directly. The mist kept the humidity high. On Day 12, I removed the bag for a few hours. I wanted to acclimate the plantlets to lower humidity. They looked fine. No wilting. On Day 14, I separated the plantlets. I used a sterilized spoon to lift them out. I potted each one in its own small pot. I used the same sphagnum moss mix. I watered with distilled water. They survived.
The Mistakes I Made Along the Way
I’m not perfect. I made errors. Here’s what went wrong:

Mistake 1: Overwatering
I was too eager. I watered the moss every day. The moss stayed soggy. The leaf turned brown. I stopped watering for three days. The moss dried out slightly. The leaf recovered. Now I water only when the moss feels barely damp. I stick my finger in the soil. If it’s wet, I wait.
Mistake 2: Wrong Light Position
I placed the pot on a south-facing windowsill. Direct sun hit the leaf. It burned within hours. The leaf turned crispy. I moved it to an east-facing window. Indirect light only. The new leaf thrived. Butterworts like bright but filtered light. Direct sun is a death sentence.
Mistake 3: Using the Wrong Pot
I used a decorative pot without drainage holes. Water pooled at the bottom. Roots rotted. The plantlet died. I switched to a nursery pot with drainage holes. I placed it inside a tray. I water from the bottom now. The roots grow downward, seeking water. It’s healthier.
3 Deadly Mistakes Newbies Make
I’ve been there. I’ve seen others make the same errors. Here are the three biggest:
1. Overwatering
I cannot stress this enough. Butterworts are not like regular houseplants. They don’t need constant moisture. The soil should be damp but not wet. Overwatering leads to root rot. Root rot is irreversible. I lost two plants to this. Now I use the “finger test.” If the soil feels wet, I skip watering. Use distilled water only. Tap water adds minerals that accumulate over time.
2. Wrong Light
Butterworts need bright light. But not direct sun. I tried placing mine on a sunny balcony. The leaves bleached within a week. The dew vanished. The plant stopped growing. I moved it to a north-facing window. It recovered slowly. But the damage was done. The American Horticultural Society (AHS) at AHS suggests that most carnivorous plants prefer dappled light. I follow that rule now.
3. Wrong Pot
I used a glazed ceramic pot once. It looked beautiful. But it had no drainage. Water sat at the bottom. The roots suffocated. The plant died. I switched to a plastic pot with drainage holes. I also use a tray underneath. I water from the bottom. The soil absorbs what it needs. Excess water drains away. It’s simple but effective.
My Personal Journey with Butterwort Propagation
I started with one butterwort. I killed it. I bought another. I killed that too. I was frustrated. Then I read about distilled water. I tried again. I used sphagnum moss. I placed the leaf in a humid bag. I waited. Two weeks later, I had three plantlets. I felt like a plant wizard. Now I have a dozen butterworts. They’re all propagated from that single leaf. I give them away to friends. They all use distilled water now. It’s the only way.
Common Questions About Butterwort Propagation
Can I use tap water if I let it sit overnight?
No. Letting tap water sit doesn’t remove minerals. Chlorine may evaporate. But calcium and magnesium stay. These minerals harm butterworts. I tried it. My plant grew slower. The leaves had spots. Stick to distilled water. It’s safer.
How long does it take for a butterwort leaf to root?
It takes about 1 to 2 weeks. I saw roots on Day 4. Plantlets appeared by Day 7. Full separation happened on Day 14. But it depends on the leaf health and conditions. Some leaves take longer. Be patient. Don’t disturb the leaf.
Can I propagate butterwort in water?
Technically yes. But I don’t recommend it. Water propagation increases rot risk. The leaf needs oxygen. Submerging it in water suffocates it. I tried it with one leaf. It rotted in three days. Soil propagation is safer. Use sphagnum moss or peat moss.
Advanced Tips for Better Results
I’ve fine-tuned my process over time. Here are some extras:
- Use a heat mat. I placed my propagation pot on a heat mat set to 70°F. It speeded up rooting. The roots appeared by Day 3.
- Use a humidity meter. I keep the humidity around 80%. A cheap meter from Amazon works.
- Avoid fertilizers. Butterworts are non-carnivorous during propagation. They don’t need extra nutrients. Fertilizers burn the young roots.
- Keep the medium sterile. I sterilize the sphagnum moss by boiling it. Then I let it cool. It kills any fungal spores. Prevention is better than cure.
The Role of Distilled Water in Long-Term Care
After propagation, I continue using distilled water. I water my butterworts from the bottom. I fill the tray with distilled water. The soil absorbs it. I let the tray dry out before watering again. This prevents mineral buildup. The Royal Horticultural Society (RHS) at RHS emphasizes that long-term water quality affects plant health. I agree. My butterworts have been thriving for months. They produce dew. They catch gnats. They look beautiful.
Final Thoughts on Propagation
I’ve learned that propagation is about patience. Don’t rush. Don’t overwater. Use distilled water. It’s the single most important factor. I’ve seen people use tap water and wonder why their plants die. The answer is simple. Minerals kill. Distilled water saves. I’ll never use anything else. If you’re starting, buy a gallon of distilled water. It’s cheap. It’s effective. Your butterwort will thank you.
FAQ Section
How often should I water my butterwort during propagation?
Once a week is enough. I water the soil only when it feels dry. The humidity bag keeps moisture in. Overwatering is the biggest risk. I check the soil every three days. If it’s damp, I wait.
Can I use rainwater instead of distilled water?
Yes. Rainwater is naturally low in minerals. I collect rainwater in a clean container. I use it for my butterworts. But I live in a clean area. If you’re in a polluted city, rainwater may contain contaminants. Distilled water is safer.
Why is my butterwort leaf turning yellow?
Yellowing is a sign of stress. It could be overwatering, underwatering, or too much light. I check the soil first. If it’s wet, I stop watering. If it’s dry, I water lightly. If the light is too direct, I move the pot. Most yellow leaves recover if caught early.





