 bluename
 How to Propagate Butterwort: Eco-Friendly Methods That Actually Work
Let me give it to you straight. If you want to propagate butterwort, the fastest eco-friendly method is leaf pullings. Gently tug a healthy outer leaf downward, let it dry for a day, lay it on damp sphagnum moss, and keep it in bright indirect light. That's it. I killed three butterworts before I got this right. And the biggest lesson? Most of my failures came from doing too much, not too little. In this guide, I'll walk you through every step I use now, plus the exact mistakes that cost me months of trial and error. I'll also share my full two-week observation log so you know what to expect at every stage.
If you're reading this, you probably already love carnivorous plants. Butterworts, or Pinguicula, are some of the most forgiving ones. Honestly, they're the gateway plant for many growers. But they're still picky about a few things. And if you get those things wrong, your cuttings will rot before they ever root.
I've been growing butterworts for a while now. I've made nearly every mistake you can imagine. I've also read everything I could from the RHS and the AHS to back up my hands-on experience. So take this as a friend's advice, not a textbook lecture. Let's dig in.
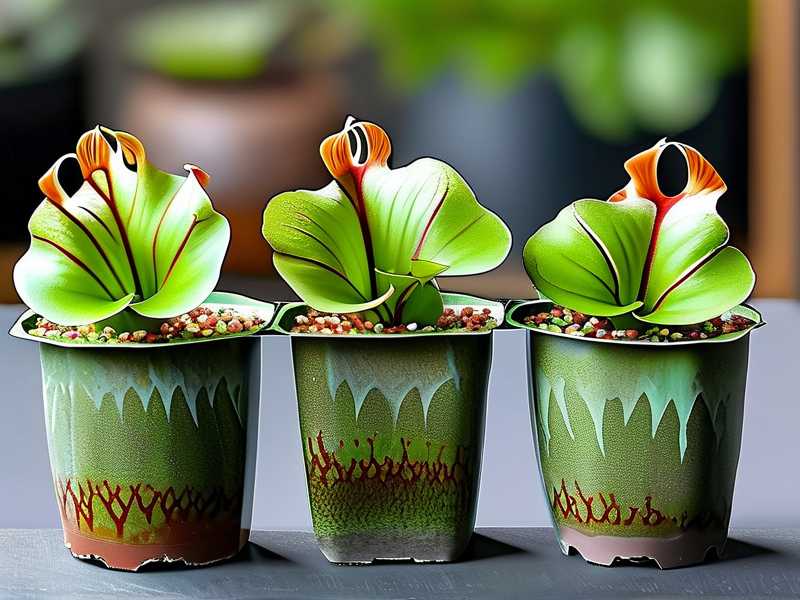
The Three Deadly Mistakes Every New Grower Makes
Mistake 1: Watering Too Much
Here's the thing. Butterworts are not tropical houseplants. They don't want to sit in a swamp. Their roots are delicate and shallow. They breathe through their roots, believe it or not. If you drown them, they die.
I used to think more water meant happier plants. I was wrong. The first butterwort I owned turned into brown mush within three weeks. I was watering it every other day. The soil never dried out. The roots suffocated and rotted. I didn't even realize it until I tipped the pot over and saw black, slimy roots.
Read this carefully. 90% of indoor plants die from overwatering. For carnivorous plants, that number feels even higher. Butterworts especially hate wet feet. They prefer moist, airy conditions. Not soaked. Not soggy. Just lightly damp.
What works for me now? I use the tray method, but with a twist. I put a thin layer of distilled water in the tray, let the soil absorb it for about 30 minutes, then pour out whatever remains. This way the soil stays moist but never floods. In winter, with temperate butterworts, I stop the tray method entirely. I just mist the soil lightly once a week.
Propagating butterwort cuttings? The same rule applies. Your leaf pullings need humidity, not soaking. I learned this the hard way when my first batch of pullings turned to translucent jelly in a sealed container. I had them sitting in standing water like a swamp. Disaster.
Mistake 2: Wrong Light Position
Butterworts need light. Bright light. But not harsh, scorching afternoon sunlight. Many beginners, including me, either put them in a dark corner or blast them with full sun.
I remember my second plant. I put it on a south-facing windowsill in summer. No shade. No screen. Within three days, the leaves curled and the plant bleached to a pale yellow. I genuinely thought it was dying. It kind of was.
After that, I moved it to an east-facing window. Morning sun for a few hours, then bright indirect light for the rest of the day. The new growth came in greener and stronger. Honestly, that simple change made all the difference.
For cuttings, light matters even more. Too little light and they won't root. Too much and they burn. I keep my propagation tray on a north-facing shelf with a small LED grow light running for about 12 hours a day. It sits about 20 centimeters above the tray. That setup has worked beautifully for me. You don't need expensive equipment either. A basic LED strip or a daylight bulb works fine.
Mistake 3: Using the Wrong Pot
This one took me a while to figure out. The type of pot you use can literally determine life or death for your butterwort.
My third plant died in a pretty ceramic pot. No drainage hole. I thought I was being smart by adding pebbles at the bottom. It didn't help. Water pooled under the roots and the plant got root rot. Again.
Here's the deal. Butterworts need pots with drainage holes. Period. Plastic pots work great. Terracotta is okay but can dry out too fast. My favorite is a squat, wide plastic pot. Butterworts grow horizontally, not deep. So a shallow pot about 5 to 8 centimeters deep is ideal.
For propagations, I use clear plastic cups with holes poked in the bottom. I can see the root growth without disturbing anything. That's a huge advantage when you're waiting for tiny leaves to sprout. The clear plastic also creates a natural mini greenhouse when you cover it loosely with a plastic bag or another cup.
I had to kill a few plants to learn this. You don't have to. Just pick the right pot from day one, and you're already ahead of where I was.
My Exact Method: Propagating Butterwort by Leaf Pullings
Now let's get into the good stuff. The most reliable, eco-friendly way to propagate butterwort is through leaf pullings. It requires zero chemicals, zero plastic waste beyond what you already have, and each leaf can turn into several new plants.
I'm going to walk you through the process I use every single time. I'll include my two-week observation log so you can follow along and know what to expect.
Step 1: Choose the Right Leaf
You want a leaf from the outer edge of the rosette. These are the mature leaves. They have the most energy stored in them. Young center leaves are still growing and won't root well.
Grab the leaf near its base with your thumb and index finger. Then gently pull downward and outward. You want to remove the leaf with its base intact. A clean pull makes all the difference. If the leaf tears or breaks, it might still root, but the chances drop significantly.
I had leaves that snapped in half and still produced plantlets. So don't throw broken pieces away. Just place them on the soil too. Sometimes life surprises you.
Step 2: Let the Pullings Dry
This is the step everyone skips. After pulling, the base of the leaf is an open wound. If you stick it straight into soil, it can rot from bacterial infection.
Place the leaves on a dry paper towel for 12 to 24 hours. This allows the wound to callus over. A callused leaf base resists rot much better. You'll see a slightly shiny or thick membrane form over the cut end. That's exactly what you want.
I keep my drying leaves on a plate near the window. Not in direct sun. Just on the counter. If it's winter and the air is dry, 24 hours is fine. Humid climates might need a bit longer.
Step 3: Prepare the Propagation Tray
Here's what I use:
- A clean, clear plastic tray or cup
- Sphagnum moss or a mix of peat and perlite
- Distilled water or rainwater
- A spray bottle
For the medium, I prefer live or dried sphagnum moss. It stays moist, has superb drainage, and naturally resists mold. That last point is critical because mold is the number one enemy of leaf propagation.
My current mix is about 60 percent sphagnum moss and 40 percent perlite. The perlite keeps air pockets in the soil. The moss holds moisture without becoming waterlogged. This combo has given me a rooting success rate of about nine out of ten pullings.
Moisten the medium with distilled water. Squeeze it out so it's damp but not dripping. Fill your tray or cup to about 3 centimeters deep. Then lightly press the medium down to remove air pockets.
Step 4: Lay the Leaves on Top
Here's a tip that took me forever to learn. Butterwort leaves don't need to be buried. They root just fine when laid flat on the soil surface.
I lay each leaf with the base slightly pressed into the moss. The leaf blade sits on top. I angle them so the base makes contact with moist medium. You can propping multiple leaves in one tray. Just space them out enough so they don't touch each other.
I used to stick them vertically into the soil like little flags. That was a mistake. The buried parts rotted half the time. Laying them flat gave me far better results.
Step 5: Cover for Humidity
Butterwort cuttings love high humidity. Around 70 to 90 percent relative humidity is ideal. Without that humidity, the leaves dry out before they can root.
The easiest way to create this environment is to cover your tray with a clear plastic lid, plastic wrap, or a zip-lock bag. I use a clear takeout container with a lid. It's free, reusable, and does the job perfectly.
Important: leave a small gap for air circulation. Completely sealed containers can cause condensation buildup. That stagnant moisture invites mold. I prop the lid open with a toothpick. Simple, right.
Step 6: Find the Right Spot
Place your tray in bright, indirect light. The temperature should be around 20 to 25 degrees Celsius. This warmth encourages rooting without stressing the leaves.
I keep my tray on a north-facing shelf with a grow light. But a bright windowsill with a sheer curtain works too. The key is consistency. Don't move the tray around. Pick a spot and trust it.
My Two-Week Observation Log
This is exactly what I saw when I propagated butterwort last spring. I started with eight leaves. Here's how it went.
Day 1 to Day 3: Patience Mode
Day 1. The leaves look exactly as they did when I pulled them. Nothing changes. I want to peek under them to check for roots. I don't. That's the hardest part, honestly.
Day 2. I notice a tiny bit of condensation on the lid. Good sign. That means the humidity is holding. I open the lid for a few minutes to let fresh air in. I check the moss. Still damp. No action needed.
Day 3. One of the leaves at the edge looks slightly translucent near the base. My heart sinks. I think it's rotting. I carefully lift the leaf. It's actually a new plantlet forming, not rot. The color is pale and shiny because it's new growth. I close the lid and leave it alone.
Day 4 to Day 7: First Signs of Life
Day 4. I can see tiny white dots on the base of two leaves. Those are root primordia. Basically, the first hints of future roots. They look like tiny speckles. Very easy to miss if you're not looking closely.
Day 5. The roots are now visible on three leaves. They're white, thin, and look like short hairs. I resist the urge to water. The moss is still moist. Overwatering at this stage will kill everything. I remind myself: damp is good, wet is death.
Day 6. Four leaves have roots now. The smallest root is about 2 millimeters long. Honestly, it's so tiny I need a magnifying glass to see it clearly. But it's there. Growing.
Day 7. One week in. I open the lid for 20 minutes to air out the tray. I notice a tiny, bright green dot on the base of the first leaf. That's a baby butterwort. It could be the beginning of a new rosette. I feel like a proud parent. I put the lid back and resist checking again until Day 9.
Day 8 to Day 11: The Waiting Game
Day 8. No major changes. Roots are getting longer on most leaves. A few leaves have no growth at all. I remind myself that some leaves simply won't make it. It's normal. Don't overreact.
Day 9. The tiny green dot has grown. I can see it's definitely a new leaf curling upward. Two more leaves show similar tiny bumps. Excitement levels rising.
Day 10. Roots are now about 5 millimeters long on the best-performing leaves. The moss is drying out slightly. I mist it gently with distilled water. Not drenching, just a fine spray to rehydrate the top layer.
Day 11. Two of my eight leaves turned brown at the edges. I remove them gently. They're not rotting, just no energy left. The other six are still going strong. I've learned that losing a few is part of the process. Don't take it personally.
Day 12 to Day 14: Tiny Rosettes Emerge
Day 12. The first baby rosette is clearly visible. It's about 2 millimeters wide, and I can see two distinct tiny leaves. This is the moment I was waiting for.
Day 13. A second rosette appears on another leaf. The roots on the original leaves have grown to about a centimeter. They look like white fuzz, branching out into the moss. It's genuinely beautiful under a magnifying glass.
Day 14. Two weeks in. Six leaves have rooted. Three of them have developed visible rosettes. The rest are slowly but surely developing roots. I transplant the three rosettes into their own small pots. I'm cautious and gentle. Their roots are delicate, like wet tissue paper.
The kicker? By Week 8, those three plantlets will be big enough to handle a full tray. And by month six, they'll be mature enough to flower. All from a few leaves that would have died anyway when the plant shed them. This method is not just effective. It's also completely waste-free and sustainable.
Method 2: Propagating Butterwort by Division
If you already have a large butterwort, division is even easier than leaf pullings. I did this last autumn with a big temperate butterwort. It took about ten minutes and gave me three separate plants.
When to Divide
The best time is spring or early summer. The plant is actively growing and recovers quickly. If your butterwort has multiple crowns or rosettes, division is straightforward.
Look at the base of the plant. You'll see where the rosettes are joined. Each one can become its own plant. Make sure each division has at least a few roots attached.
How I Do It
- Water the plant the day before. This loosens the soil and reduces root damage.
- Gently slide the entire plant out of its pot.
- Shake off excess soil. If the roots are tangled, soak the root ball in distilled water for 10 minutes to make it easier to separate.
- Carefully tease apart the rosettes. Keep as many roots attached as possible. I use my fingers, not tools. Tools can cut roots you can't see.
- Trim any dead or rotten roots with sterilized scissors.
- Pot each rosette individually in a fresh, well-draining mix.
- Water with distilled water and place in bright, indirect light.
I've found that divisions establish much faster than leaf pullings because they already have roots and a working system. Within two weeks, I saw healthy new growth on all three divisions. They looked a little shocked for the first few days, but bounced back with vigor.
My Advice for Division
Don't divide your plant too often. Butterworts grow best when they have a bit of room to spread. The AHS suggests generous spacing for most perennial divisions, and the same principle applies here. Give the plant space. It'll reward you.
The tricky part is avoiding rot at the cut site. I made this mistake once. I divided a plant, placed it directly in soil, and watered it. A week later, the base was mushy. Now I always let the divisions sit out for six hours before potting. That little air-drying step saves a ton of heartache.
Method 3: Propagating Butterwort from Seeds
Yes, you can also grow butterworts from seed. It's a slower method but deeply rewarding. I have a soft spot for this one because every seedling is completely unique.
How to Collect Seeds
Butterwort flowers can be self-pollinated or cross-pollinated. If you want seeds, gently touch the flower with a fine brush. Move from flower to flower. This simulates what insects do naturally.
After pollination, the flower will produce a small capsule. When it dries and cracks open, you'll find dozens of dust-like seeds. Harvest them carefully. I use a folded piece of paper to catch them as they drop.
Sowing the Seeds
Sprinkle the seeds on the surface of your soil mix. Don't bury them. Butterwort seeds need light to germinate. I mist them with distilled water and cover with a clear lid to seal in humidity.
Most butterwort species germinate in two to four weeks. Temperate species may need a cold period first. That means placing the seed tray in the fridge for about four to six weeks before warming it up again. This mimics winter and breaks dormancy.
What I Learned
My first attempt at seeding butterworts failed completely. I sowed them in winter and didn't provide any cold stratification. Nothing happened. I thought the seeds were bad. It turns out they just needed chill time. After a month in the fridge and another month on a warm windowsill, I had more seedlings than I could count.
Seedlings are tiny. I'm talking dust-mote tiny. Grow them under bright but gentle light. Don't let them dry out. Use distilled water only. After about three months, they'll be big enough to handle individually.
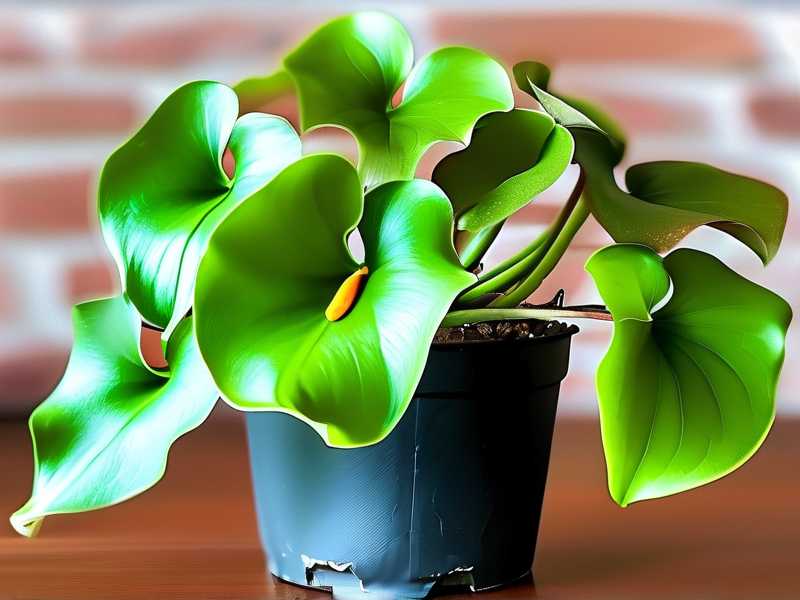
Seeds are the most eco-friendly method because one pod produces hundreds of new plants. You don't even need to buy more plants. Just grow from what you have. But honestly, seeds require patience. If you want quicker results, stick with leaf pullings.
The Eco-Friendly Setup: A Complete Guide to Butterwort Care
The Right Soil Mix
Butterworts are adapted to poor, mineral-deficient soil. Their roots can't handle rich potting mix or fertilizer. They literally eat insects to make up for the lack of soil nutrients. Use a soil mix of one part peat moss and one part perlite. Or if you prefer, live sphagnum moss alone works well. Avoid anything with compost or added fertilizer.
The Right Water
This is crucial. Butterworts need distilled water, rainwater, or reverse osmosis water. Tap water contains minerals that build up in the soil and burn the delicate roots. I've seen so many new growers make this mistake. They water with tap water, the plant gradually declines, and they can't understand why.
I collect rainwater in a bucket and store it in a glass jar. It's free, eco-friendly, and perfect for carnivorous plants. If you live somewhere with frost, store the rainwater indoors during winter. Frozen water is fine to melt and use, but the expansion can crack glass containers.
The Right Light
Butterworts love brightness but not burning direct sun. You want around 12 to 14 hours of bright, indirect light. A windowsill with a sheer curtain is ideal. If you grow under artificial light, position the lamp 15 to 25 centimeters above the plant. Too close will bleach the leaves. Too far, and growth becomes leggy.
The Right Feeder Strategy
Butterworts catch small insects like gnats and flies. If your plant is outdoors, it will catch its own food. If it's indoors, it might need a hand. You can feed it with small dried insects like bloodworms or daphnia, rehydrated in distilled water. Use tweezers to place a tiny bit on the leaf. Don't feed more than one leaf at a time. Overfeeding can rot the leaf.
Do not use plant food. Chemical fertilizer will kill your butterwort. I can't stress this enough. Once, I absent-mindedly added a drop of liquid fertilizer to a newly repotted butterwort. It turned black within a week. The roots cannot handle it.
Common Butterwort Propagation Problems and Fixes
Mold Growth on Your Leaves
If you see gray or black fuzz on your leaf pullings, you probably have too much humidity and not enough airflow. Increase ventilation by opening the lid for a few minutes daily. You can also sprinkle a little cinnamon powder on the affected area. It's a natural antifungal. I've used this trick and it works surprisingly well.
Leaves Turning Translucent
This means they've absorbed too much water. The cells are bursting. Remove the leaf immediately and reduce moisture in your tray. Let the medium dry out slightly before covering again.
No Roots After Three Weeks
Some leaves take longer. Give them more time. But also check your conditions. Is the temperature warm enough? Is the light bright enough? I've had leaves that took five weeks to root. Don't toss them too early.
Baby Plantlets Dying After Transplant
The transition from the humid propagation tray to normal pots is stressful. I've lost a few tiny plantlets this way. Now I harden them off. That means gradually opening the lid a little more each day over a week. This lets the plant adjust to lower humidity before transplanting. It's like a plant version of training wheels.
Putting It All Together: A Simple Week-by-Week Routine
If you're new to this, here's a routine that works. It's what I do every time I propagate butterwort.
Week one: Pull leaves. Dry them. Set up a tray. Lay them on the medium. Water them with distilled water. Cover. Place in bright, indirect light. Do nothing else.
Week two: Open the lid every two days for a few minutes. Mist if the moss looks dry. Watch for roots.
Week three to four: Keep the lid slightly open. Transplant rooted leaves into small pots once you see new rosets.
Month two and beyond: Treat them like mature plants. Bright light, distilled water, good drainage.
That's it. You don't need grow tents or humidity domes. You don't need expensive soil mixes. The whole process can happen in a repurposed takeout container with a handful of sphagnum moss.
How to Make Your Butterwort Propagation Even More Sustainable
I genuinely care about reducing waste. So do many plant lovers I've met. Here's a few tips I've picked up.
Use leftover containers. Clear plastic takeout boxes, yogurt cups, and berry containers all work as propagation trays. No need to buy anything new. Poke holes in the bottom of yogurt cups for drainage. The lids of takeout boxes make excellent humidity covers.
Collect rainwater. It's free, species-appropriate, and doesn't use energy to purify. If you have a rain barrel or even a bucket outside, you already have excellent water for your plants.
Make your own soil mix in bulk. Buy a bag of peat and a bag of perlite. They last for years if stored dry. You'll avoid the plastic wrapper of pre-mixed carnivorous plant soil every time you repot.
Trade with friends. Leaf pullings are so easy to harvest that you'll end up with extras. Trade them with fellow plant lovers for other carnivorous species. It's a great way to expand your collection without increasing demand for commercially grown plants.
FAQs About Butterwort Propagation
How long does it take for butterwort leaf pullings to root?
Most leaves will develop visible roots within one to two weeks under good conditions. Tiny rosettes usually form by week three. Some leaves are slower and need up to five weeks. As long as the leaf still looks green and firm, it's still working. Patience is everything.
Can I use tap water to propagate butterwort?
I don't recommend it. Tap water contains dissolved minerals that accumulate in the soil. Butterwort roots are adapted to pure water and low-mineral soil. Over time, these minerals burn the roots and slowly kill the plant. Use distilled water, rainwater, or water from a reverse osmosis filter. If you're in the UK, the RHS also recommends rainwater for carnivorous plants. It's the safest and cheapest option.
Do butterworts die after flowering?
No, they don't. Flowering uses energy, but the rosette usually continues growing. Some temperate species slow down or go dormant after flowering. Mexican species might shrink their leaves but keep surviving. If you want to maximize propagation success, remove the flower stalks when they first appear. This directs energy into leaf production instead of seed production. If you'd rather collect seeds, let the flowers do their thing.
Final Thoughts from a Fellow Butterwort Grower
The reason I love propagating butterwort so much is that it's such a forgiving, satisfying process. Once you get the basics down, it's almost hard to fail. Use the right soil. Keep it moist. Give it light. Don't overthink it.
When I look back at all the plants I killed, I realize something. Every single mistake taught me a lesson that made me a better grower. That first rotted mess from overwatering led me to create a proper tray system. The burned leaves taught me about light placement. The ceramic pot without drainage taught me about container choice. These weren't failures. They were experiments. Just expensive ones.
Now I have more butterworts than I know what to do with. I start them in old takeout containers. I water them with collected rain. I gift them to friends. In summer, they sit by open windows and snack on fruit flies. In winter, they rest under a bright LED. They ask for so little and give so much.
If you're just starting your butterwort journey, here's my honest advice. Start with one healthy plant. Try pulling a few leaves after a few months. Watch them root and grow. You'll be amazed at how simple and beautiful the process is. Then, when you've mastered leaf pullings, try division. Then, if you're feeling adventurous, grow them from seed. Each method teaches you a little more about how these clever little carnivores live.
And if you hit a setback? Remember that every experienced grower once killed a plant. I killed four before I got the hang of it. The trick is to learn, adjust, and try again. Your butterwort will thank you.
Happy growing. I hope your propagation tray fills up with shiny green rosettes in no time. If you have questions, ask. The plant community is the most generous I've ever been part of. Someone will have the answer you need.





