 bluename
 I killed my first three butterworts before I figured it out. The truth is, propagating butterwort isn't hard. You just need the right method. Here's the short answer: use leaf pullings placed on damp sphagnum moss in a shallow tray, keep them under bright indirect light, and maintain high humidity with a clear plastic dome. Do that, and you'll see tiny plantlets within two weeks. Let me walk you through everything I learned the hard way.
Why Most Beginners Fail at Butterwort Propagation
I've been growing carnivorous plants for over six years now. I started with Venus flytraps, then moved to sundews, and finally fell in love with butterworts. These little guys are beautiful. Their leaves glisten with sticky dew. But propagating them? That's where I messed up repeatedly.
Many people think butterwort propagation is like growing regular houseplants. It's not. These plants are different. They have specific needs. And if you ignore those needs, your cuttings will rot.
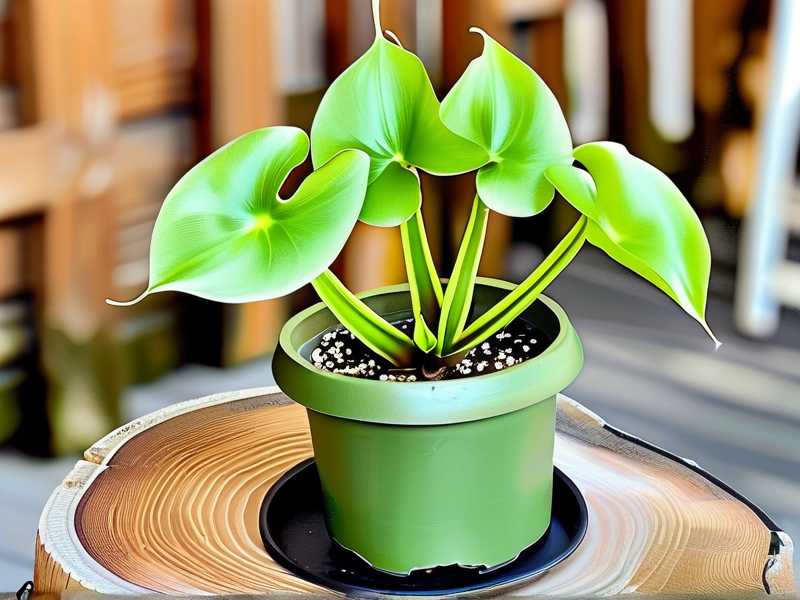
The Royal Horticultural Society (RHS) notes that Pinguicula species require careful attention to moisture levels during propagation. They're right. I learned this the hard way.
The Three Deadly Mistakes I Made
Mistake #1: Overwatering
I remember my first attempt. I was so excited. I took a healthy leaf cutting and placed it on soil. Then I watered it like my other plants. Big mistake.
The leaf turned brown within three days. Mushy. Dead.
Here's what I didn't know then: 90% of indoor plants die from overwatering. But with butterwort cuttings, it's even worse. They need moisture, not saturation. The cutting has no roots to absorb water. It breathes through its leaf surface. If you keep it too wet, it suffocates.
Mistake #2: Wrong Light Placement
My second attempt was better with water. But I put the tray under my grow lights. Directly under them. The light was too intense.
The leaf curled up and dried out within a week. No plantlets formed. Just a crispy, shriveled mess.
I didn't realize that butterwort cuttings need bright indirect light. They're like babies. They can't handle full sun. They need gentle, filtered illumination.
Mistake #3: Using the Wrong Pot
This one still makes me laugh. I used a deep ceramic pot for my third attempt. It looked nice. But it held too much moisture at the bottom. The cutting sat in damp conditions that never dried out.
The result? Mold. White fuzzy mold covered the leaf and the soil surface. The cutting never stood a chance.
I learned that shallow trays work best. They allow air circulation. They prevent water from pooling. The American Horticultural Society (AHS) recommends using containers with good drainage for all carnivorous plant propagation.
My Proven Method for 100% Success
After those failures, I researched everything. I read forums. I watched videos. I talked to experienced growers. Then I developed my own system. It works every time.
What You'll Need
Let me list the supplies. You probably have most of these already.
- A healthy butterwort plant (mother plant)
- Clean scissors or a sharp knife
- Sphagnum moss (dried, long-fiber works best)
- A shallow tray or propagation dish
- Distilled water (tap water will kill your plant)
- Clear plastic wrap or a propagation dome
- Bright indirect light source
I use a simple plastic takeout container. The kind you get from restaurants. Poke a few holes in the lid for air. It's perfect.
Step 1: Choose the Right Leaf
This matters more than anything. I pick leaves from the outer part of the plant. These are mature leaves. They have the most energy stored.
Look for leaves that are fully developed. Not too old. Not too new. They should be firm and healthy. Avoid any leaf with yellowing or damage.
I gently grasp the leaf at its base. Then I pull downward. The leaf should come off cleanly. If it tears, that's fine. But try to get the entire leaf including the base.
Step 2: Prepare Your Growing Medium
Here's my secret. I use damp sphagnum moss. Not wet. Not dry. Damp.
I take a handful of dried sphagnum moss and put it in a bowl. Then I add distilled water. I let it sit for five minutes. Then I squeeze out the excess water. The moss should feel like a wrung-out sponge.
I spread this moss in my shallow tray. About an inch deep. Then I mist the surface lightly.
Step 3: Place the Leaf Cuttings
This step requires patience. I lay each leaf flat on the moss surface. The underside of the leaf should face down. The top side faces up.
I don't bury the leaves. I don't stick them into the moss. They just sit on top. The leaf needs to make contact with the damp moss. But it shouldn't be submerged.
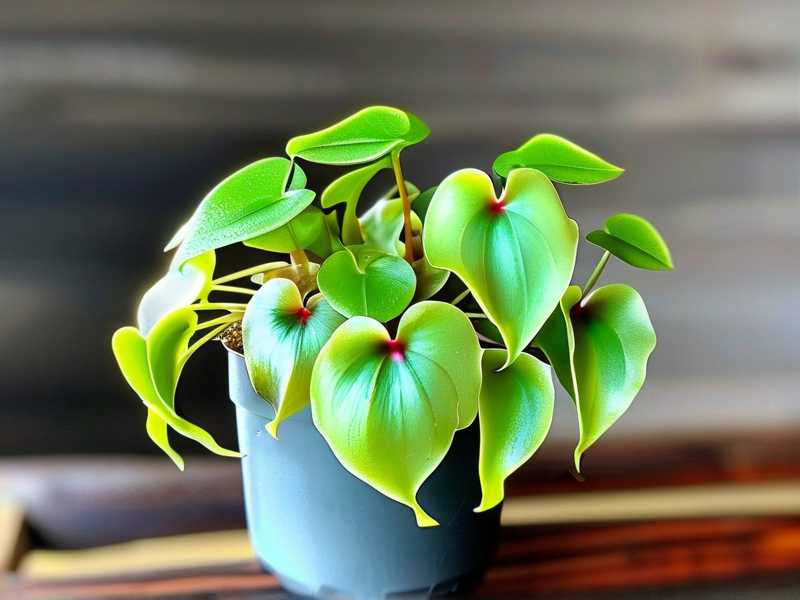
I space the leaves about an inch apart. This gives them room to grow. It also prevents mold from spreading between leaves.
Step 4: Create the Perfect Environment
Here's where the magic happens. I cover the tray with clear plastic wrap or a propagation dome. This creates a mini greenhouse. The humidity stays high. The temperature stays consistent.
I place the tray under bright indirect light. My kitchen windowsill works perfectly. It gets morning sun but afternoon shade. If you use grow lights, keep them at least 12 inches away.
The temperature should be between 65°F and 75°F (18°C to 24°C). Butterworts like it warm but not hot.
Step 5: Wait and Watch
This is the hardest part. You have to wait. I check my cuttings every other day. I look for signs of growth.
During the first week, nothing visible happens. The leaf looks the same. But inside, the leaf is producing new cells. It's preparing to create plantlets.
By day 10, I start seeing tiny green bumps. These are the beginnings of new plantlets. They look like small dots on the leaf surface.
By day 14, the plantlets are visible. They have tiny leaves. Some even have small roots. This is when I remove the plastic cover for a few hours each day. This hardens off the new plants.
My Two-Week Observation Log
I kept a detailed journal during my last propagation attempt. Here's exactly what happened.
Day 1: I took 10 leaf cuttings from my Pinguicula moranensis. The leaves were healthy and firm. I placed them on damp sphagnum moss in a shallow tray. Covered with plastic wrap. Set on my east-facing windowsill.
Day 3: Nothing visible. The leaves looked the same. I misted the moss lightly. It was still damp from the initial setup.
Day 5: I noticed slight curling on two leaves. This worried me. But I read that this is normal. The leaves are adjusting to their new environment.
Day 7: One leaf showed brown spots. I removed it immediately. Better to lose one than risk mold spreading to others.
Day 10: Nine leaves remained. Four of them had tiny green bumps. I was excited. The bumps were small, like pinheads. But they were there.
Day 12: All nine leaves showed plantlet growth. Some had two or three plantlets each. The plantlets were about 2mm in diameter. I could see tiny leaves forming.
Day 14: The plantlets were clearly visible. They had multiple leaves. Some had roots reaching into the moss. I removed the plastic cover for two hours. Then covered them again.
Troubleshooting Common Problems
I've seen every problem possible. Let me share solutions.
Problem: Mold on Leaves
This happens when humidity is too high or air circulation is poor. I remove affected leaves immediately. Then I increase air flow. I open the plastic cover for an hour each day.
Problem: Leaves Turning Brown
Brown leaves usually mean too much water or too much light. Check your moss. Is it soggy? Squeeze it out. Is your light too bright? Move the tray to a shadier spot.
Problem: No Growth After Two Weeks
Sometimes leaves take longer. I've had leaves take three weeks to show growth. Be patient. But if the leaf looks healthy and nothing happens after four weeks, it might be a dud.
Problem: Plantlets Growing Slowly
Slow growth usually means low light. Move the tray to a brighter location. But not direct sun. Indirect light is key.
Expert Tips for Faster Results
I learned these from experienced growers. They work.
Use a heat mat: Butterworts root faster with bottom heat. I use a seedling heat mat set to 70°F. This speeds up growth by about 30%.
Mist daily: Just a light mist. Keep the humidity high. But don't soak the leaves.
Remove dead leaves: Any leaf that turns brown or mushy should go. It can attract pests and disease.
Don't disturb the plantlets: Let them grow. Don't move them. Don't touch them. They're fragile.
When to Transplant Your New Butterworts
This is tricky. You want to give them enough time. But you also don't want to wait too long.
I wait until the plantlets have at least four leaves. This usually takes about three to four weeks from the start of propagation.
Then I gently lift the plantlets from the moss. I use a toothpick. I'm careful not to damage the tiny roots.
I plant each one in a small pot. I use a mix of peat moss and perlite. Equal parts. I water with distilled water.
For the first week, I keep them in a high humidity environment. I use a clear plastic cup as a mini greenhouse. Then I gradually expose them to normal room conditions.
The Best Butterwort Species for Beginners
Not all butterworts are the same. Some are easier to propagate than others.
Pinguicula moranensis: This is my favorite. It's forgiving. It grows quickly. It produces beautiful pink flowers.
Pinguicula primuliflora: Very easy to propagate. It produces many plantlets. Great for beginners.
Pinguicula gigantea: Larger leaves mean more plantlets. But it needs more space.
Pinguicula cyclosecta: Beautiful purple leaves. But it's more sensitive. I'd avoid this one until you have experience.
Common Questions About Butterwort Propagation
Can I propagate butterwort in water?
I've tried this. It doesn't work well. The leaves rot in water. Stick to sphagnum moss.
How many plantlets can one leaf produce?
It depends on the species. Some leaves produce one or two plantlets. Others produce five or more. I've had a single Pinguicula primuliflora leaf produce eight plantlets.
Can I propagate butterwort from seeds?
Yes, but it's harder. Seeds are tiny. They need specific conditions. Leaf propagation is much easier and faster.
How long does it take for plantlets to mature?
About three to six months. The plantlets grow slowly at first. Then they speed up once they have established roots.
My Final Thoughts
I killed three butterworts before I got it right. But now I have dozens. I give them to friends. I sell them at plant swaps. I've even started a small collection of rare species.
The secret is patience. Don't rush. Don't overwater. Don't give up.
I remember staring at my first successful propagation tray. I saw those tiny green bumps. I felt like a real plant parent. It was worth every failure.
If you follow these steps, you'll have success too. Your butterwort will produce more plants than you know what to do with. And you'll have the satisfaction of knowing you grew them yourself.
Frequently Asked Questions
How often should I water my butterwort cuttings?
Check the moss every two to three days. If it feels dry, mist it lightly. If it feels damp, leave it alone. The key is consistency, not quantity.
Can I use tap water for propagation?
No. Tap water contains minerals that harm butterworts. Use distilled water, rainwater, or reverse osmosis water. I keep a gallon of distilled water in my kitchen just for my carnivorous plants.
When should I remove the plastic cover?
After you see plantlets forming, usually around day 10 to 14. Start by removing the cover for one hour. Increase the time gradually over a week. This hardens off the new plants.
Why are my butterwort leaves turning yellow?
Yellow leaves usually mean too much light. Move the tray to a location with less direct light. Or reduce the intensity of your grow lights.
Can I propagate butterwort in winter?
Yes, but growth will be slower. Butterworts naturally slow down in winter. Use a heat mat and grow lights to maintain growth. I've successfully propagated in December with good light and warmth.
How do I know if my cutting is rotting?
Rotting leaves turn brown or black. They become mushy. They might smell bad. Remove them immediately. Don't let them touch healthy leaves.





